
Partner listing guide
Create a listing that helps customers discover, trust, and adopt your integration.
Introduction
Use this guide to create a clear, engaging, and review-ready listing for the SafetyCulture Integrations Marketplace.
Your listing is often a customer's first impression of your integration. Make it easy to understand what your integration does, why it matters, and how to start. This means higher adoption, better retention, and more opportunities for your business.
In this guide, you'll:
- Write benefit-focused copy customers can scan.
- Prepare visuals that attract attention and build trust.
- Submit your integration for review with confidence.
Whether you’re launching your first integration or updating an existing one, this guide helps you showcase your solution to teams who use SafetyCulture every day.
Understanding the Integrations Marketplace
The SafetyCulture Integrations Marketplace helps organizations find apps, tools, and services that work with SafetyCulture. Your listing can appear across:
- SafetyCulture website: Browse by category or search on the Integrations Marketplace page.
- In-product discovery: Featured and category recommendations in the SafetyCulture web app.
How customers use the Integrations Marketplace
Your listing is the digital storefront for your integration. It should:
- Explain what it does and who it's for.
- Build trust with accurate visuals and helpful resources.
- Improve discoverability in the Integrations Marketplace and web search.
When you create your listing, keep the customer journey in mind.
- Discovery: A customer finds your integration through search, categories, or in-app recommendations.
- Evaluation: They scan the title, tagline, screenshots, and description to decide if it solves their need.
- Action: They follow your setup guide or contact you to get started.
A clear, benefit-led listing speeds discovery, simplifies evaluation, and increases adoption.
Requirements
Become a SafetyCulture Partner
Creating a marketplace listing starts with joining the SafetyCulture Partner Program. Partnership gives your organization access to the Partner Portal, where listings are created and submitted for review, and signals to customers that your integration is officially recognized by SafetyCulture.
Joining the SafetyCulture Partner Program gives you access to co-marketing opportunities, technical resources, and the credibility of being recognized as an official SafetyCulture Partner. You can submit your expression of interest anytime.
Once approved, your next step is preparing the details and assets that will form the foundation of your listing.
Build and test your integration
Before preparing your listing, make sure your integration is complete and ready for customers. A listing is only effective if it represents a working solution that customers can use straight away.
Your integration should be:
🚀 Functional: Connects to SafetyCulture APIs or features as intended.
🧪 Tested: Validated in a real or sandbox environment.
📓 Documented: Includes clear setup steps for new users.
🎧 Supported: Your team can answer customer questions post-launch.
Having a working integration first ensures that your listing reflects real value. It also speeds up approval, since incomplete or untested integrations can’t be listed in the marketplace.
Meet SafetyCulture standards
Regardless of which elements you include, every listing must meet SafetyCulture’s standards. These guidelines exist to create a consistent, professional, and trusted experience across the Integrations Marketplace.
Your listing must:
✔️ Use clear, plain English (US).
✔️ Present accurate information without unsubstantiated claims or competitor comparisons.
✔️ Include up-to-date visuals that reflect the current user experience.
✔️ Follow SafetyCulture’s brand and badge usage guidelines.
Create and manage your listing
The Partner Portal
The Integration Marketplace Partner Portal is where you manage your listings. It gives you access to:
- Listing editor: Create and update the listing content.
- Analytics: Track listing performance, experiment with improvements, and review customer inquiries that come in through the marketplace.
This guide focuses on the listing editor, which you’ll use to prepare your listing content.
1. Create a new listing
When your integration is ready, contact your SafetyCulture Partner Manager. They will create the listing and grant you editor access to the Partner Portal. Add your content, including descriptions, visuals, and resources. All content you provide must be factual and accurate.
During review, SafetyCulture may edit or request changes. We may also ask for updates to your listing after publishing to maintain accuracy and consistency.
2. Edit the listing
The Partner Portal organizes your listing into sections that control how it appears on the Integrations Marketplace and in the web app.
Some fields in your listing, such as the title, categories, or calls to action, are configured by your Partner Manager. If you’d like to suggest changes, contact your Partner Manager directly.
Partner Setup
Your SafetyCulture Partner Manager will configure this section. It includes your company name, listing title, and assigned categories. We recommend you review them carefully to make sure they’re accurate.
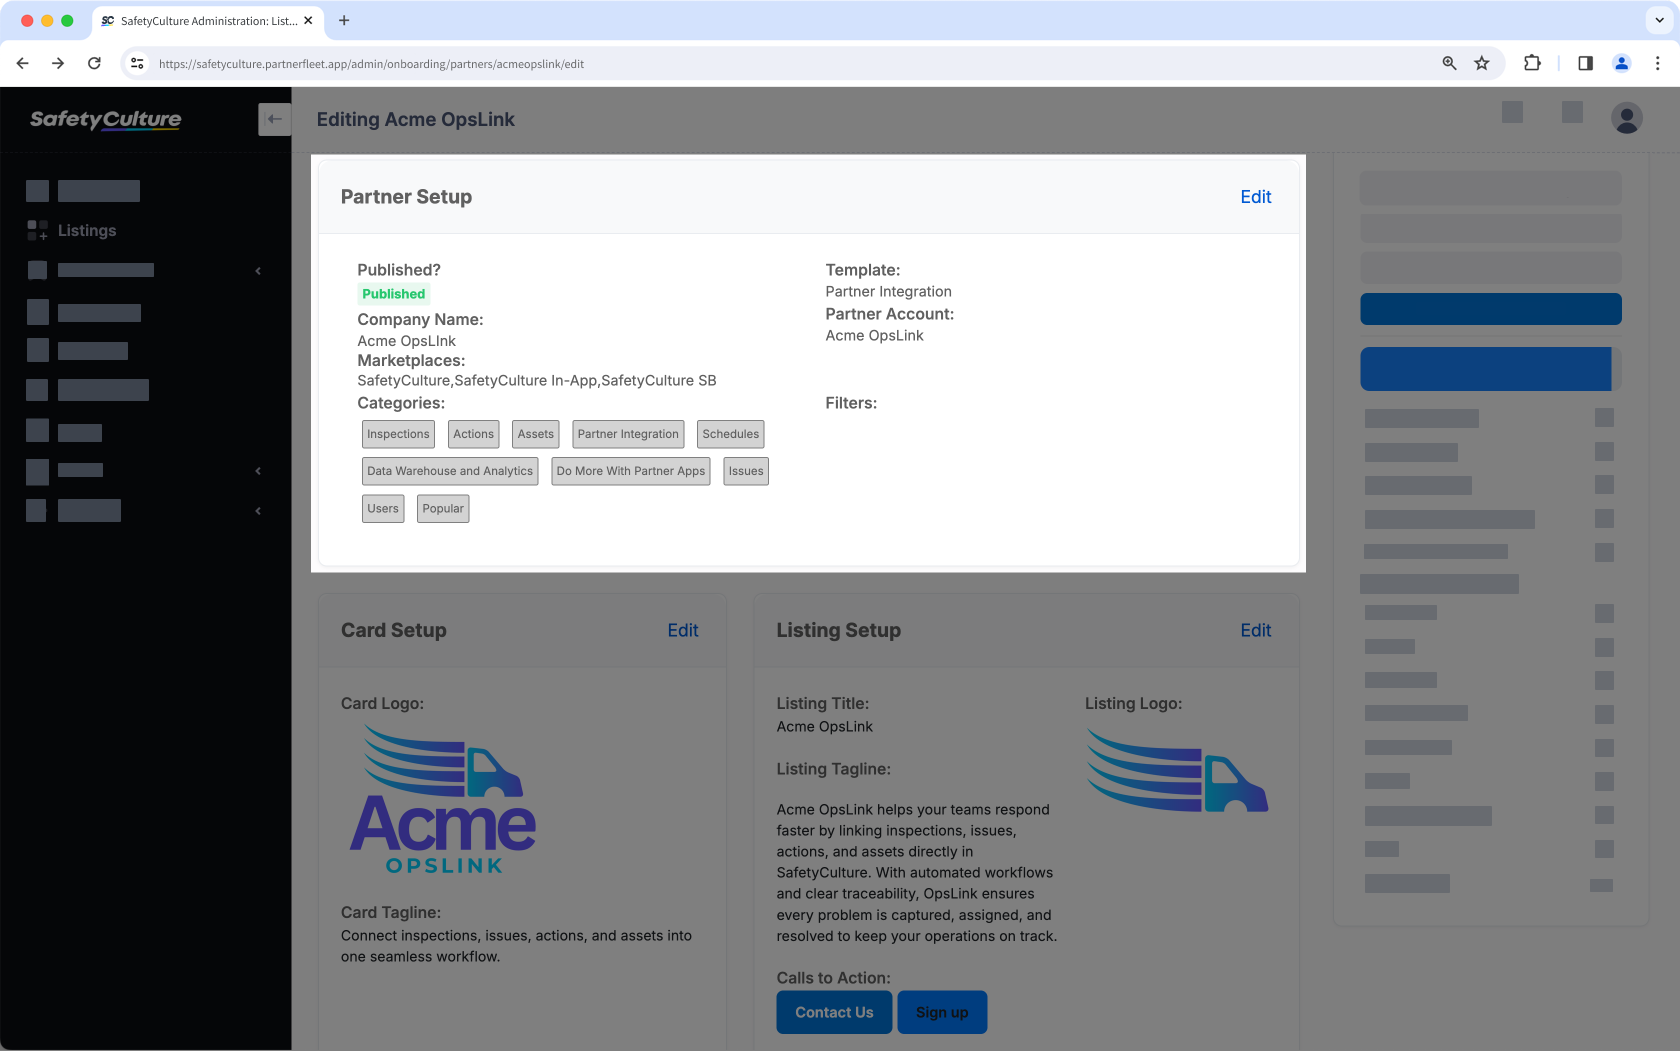
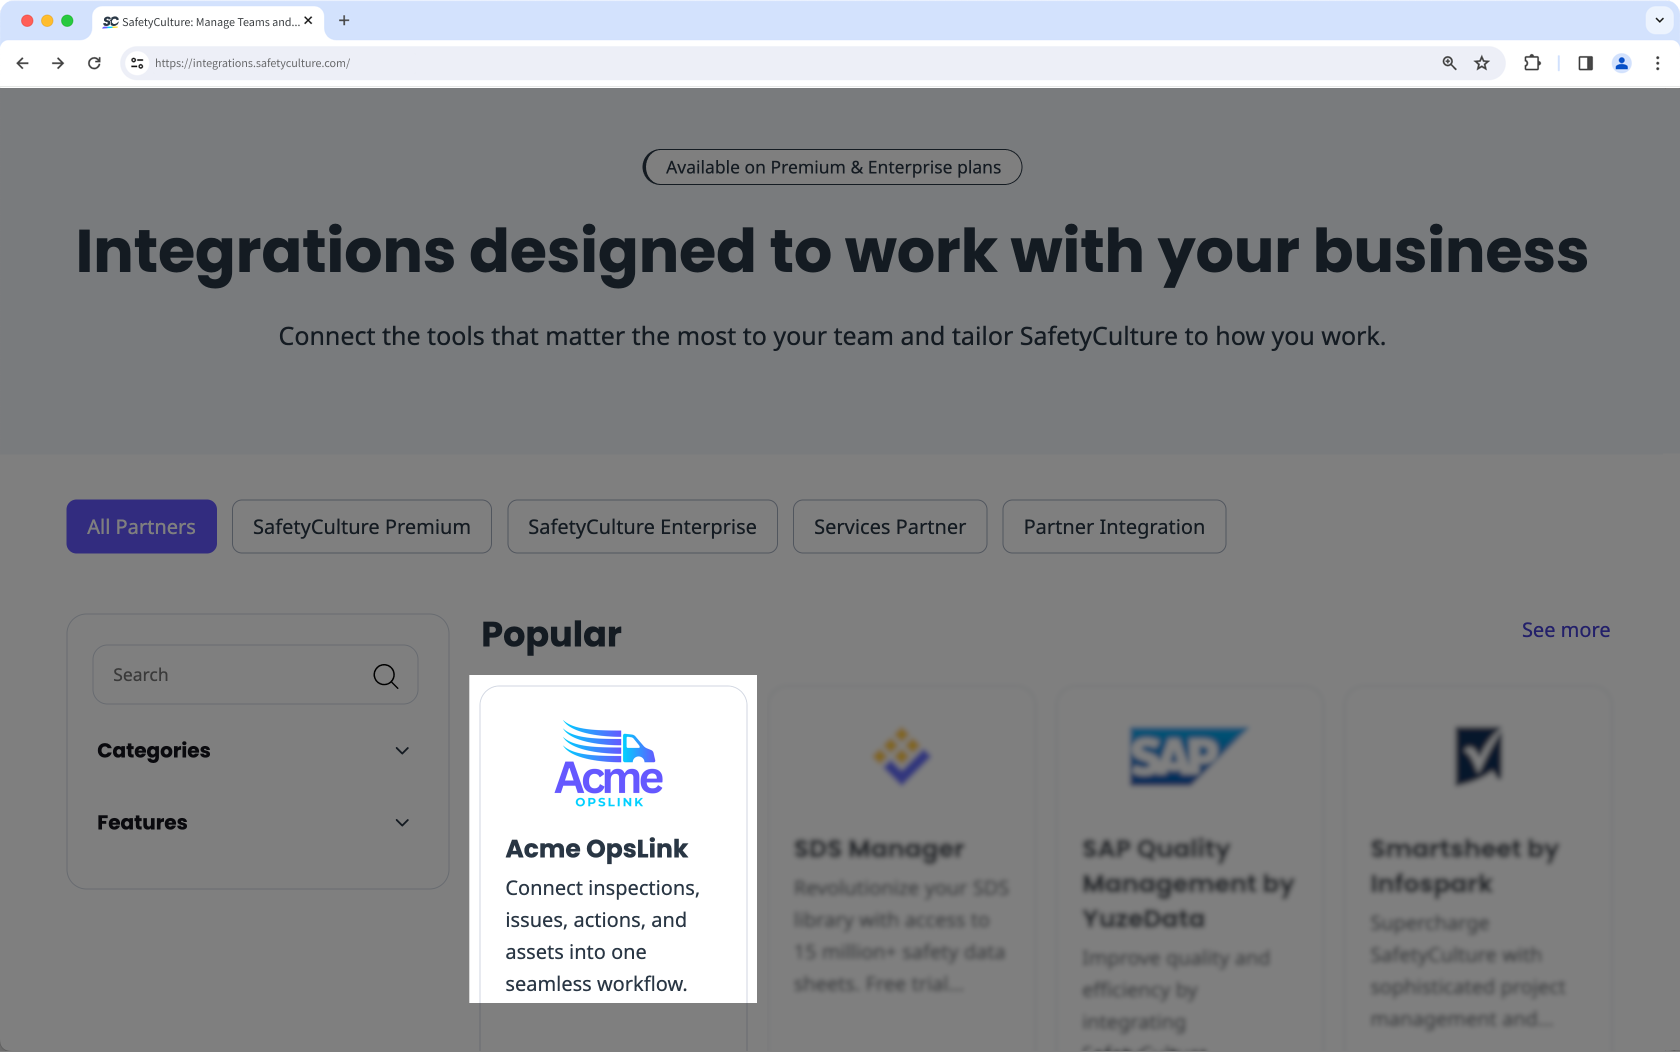
Card Setup
The Card Setup section is the small tile with your integration’s logo, name, and tagline.
| Setup view | Customer view |
|---|---|
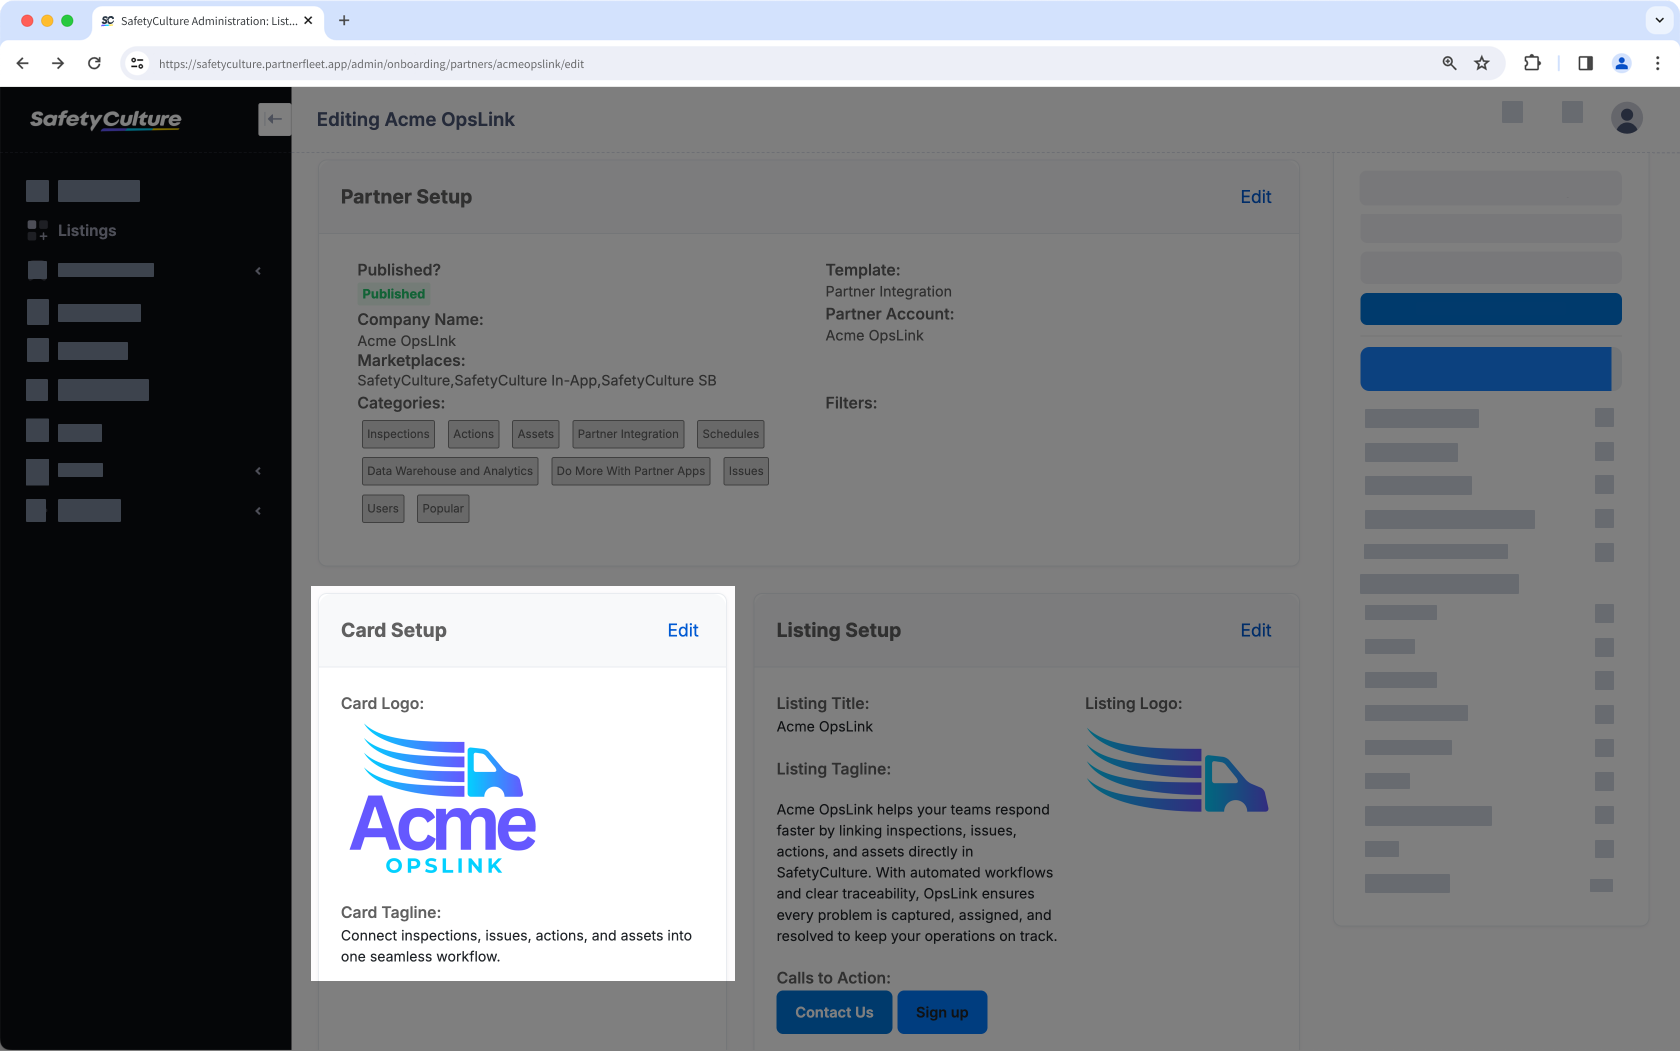 |  |
- Card Logo
A square logo works best. Use a cropped logomark with minimal or no excess padding. The recommended size is 100px height with a transparent background in a PNG format. - Card tagline
The card tagline is the short line of text that appears on your integration’s card. Customers use it to decide whether to click through to your full listing, so it needs to be short, clear, and attention-grabbing.
Focus on the customer problem you solve or a standout advantage (for example, “Monitor assets in real time” or “Free trial available”). Keep it under 80 characters to avoid truncation.
Listing Setup
The Listing Setup section controls the header area of your full listing page.
| Setup view | Customer view |
|---|---|
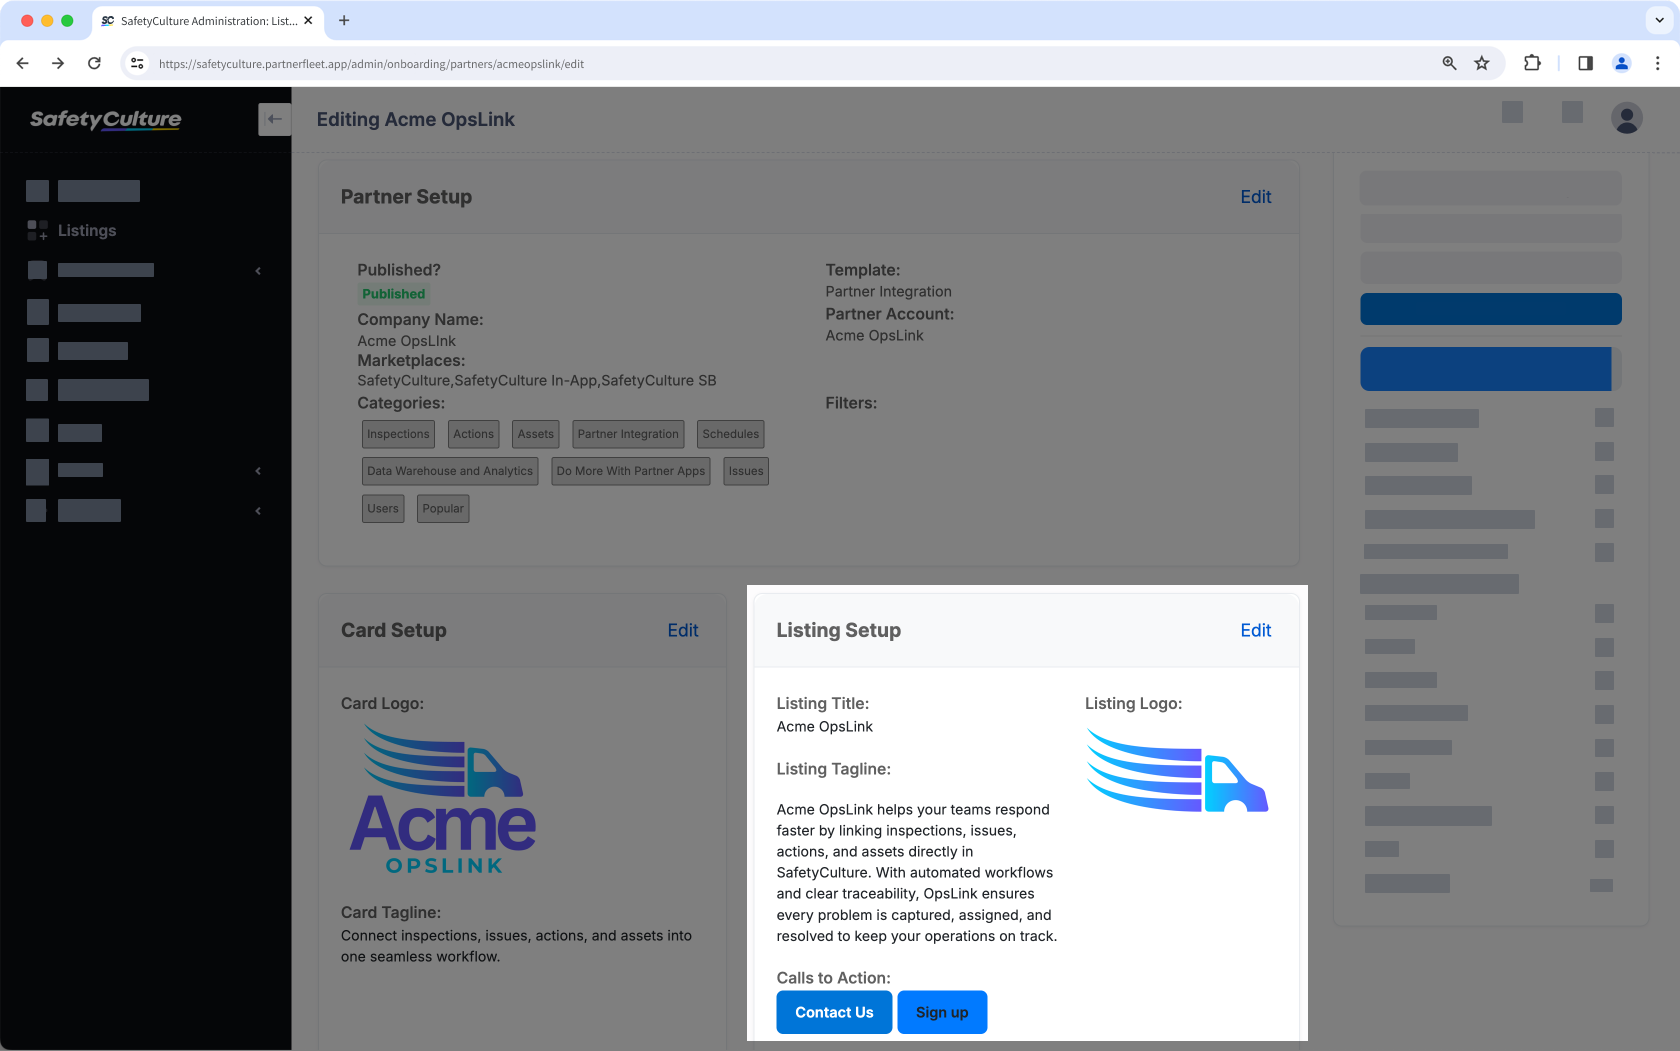 | 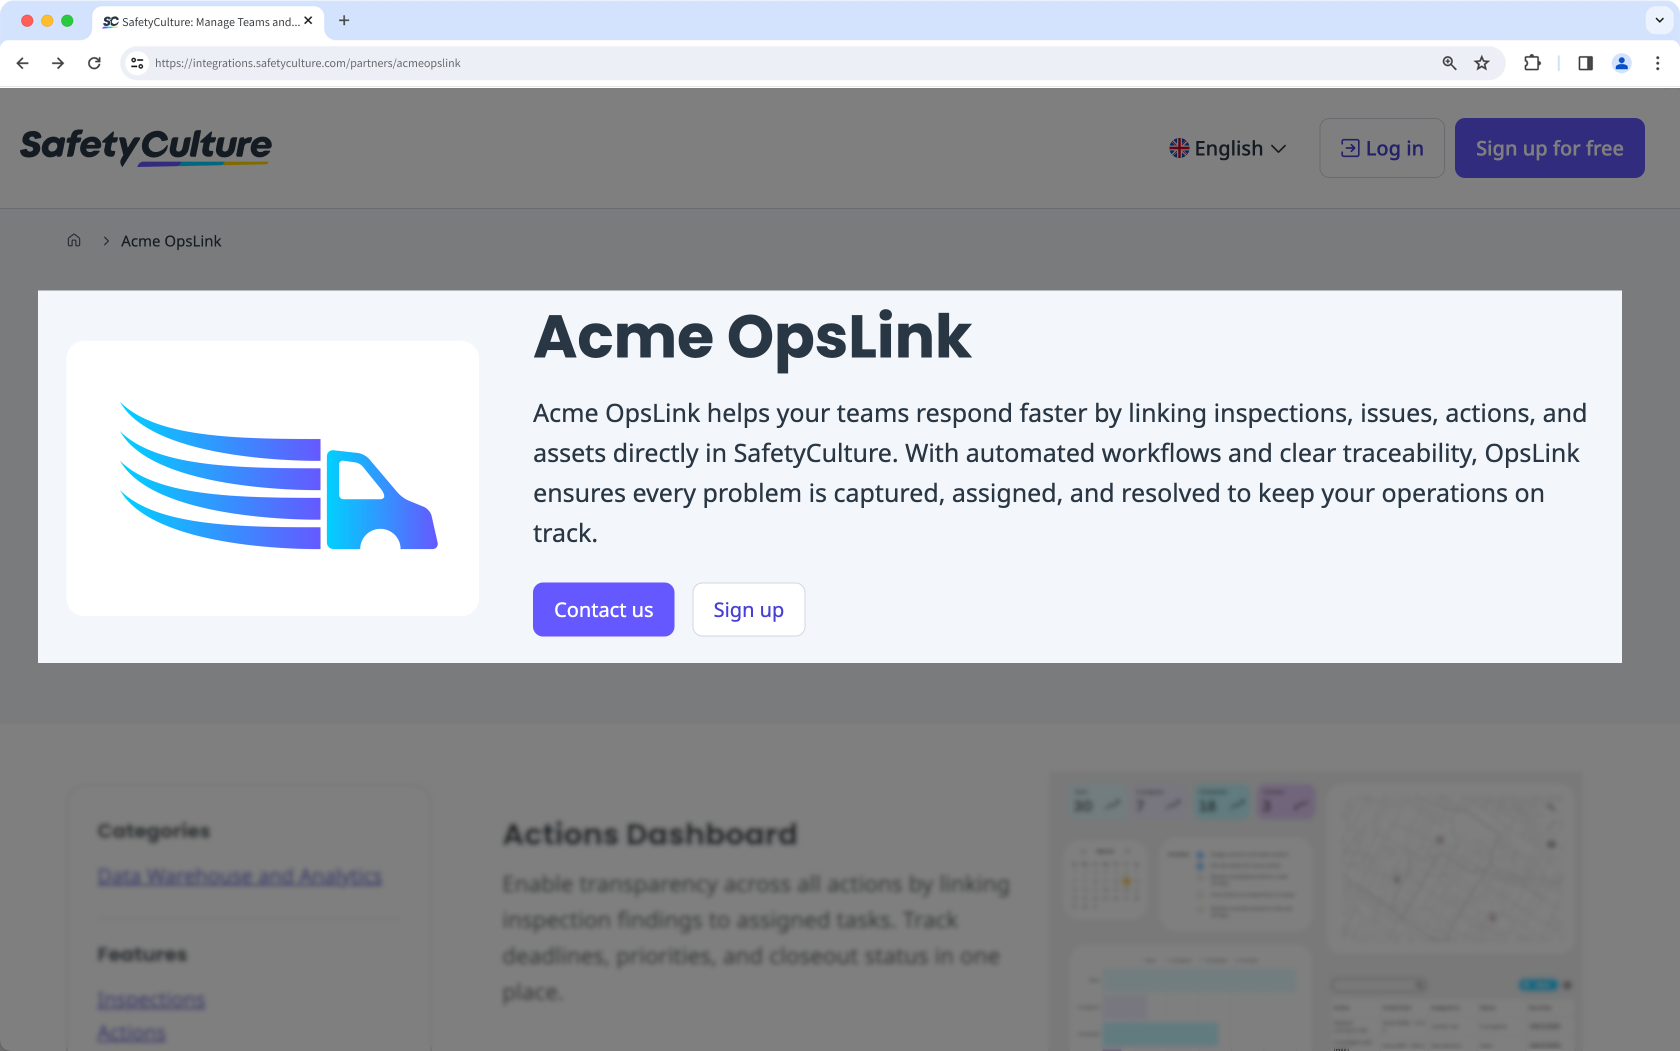 |
- Listing Title
Your Partner Manager will configure the listing title, usually formatted as "[Integration name]by[Partner name]". - Listing Tagline
The listing tagline introduces your integration at the very top of the listing page. Customers see it immediately under your integration title and logo, so it needs to make a strong impression.
Summarize the main function of your integration in one or two sentences, and keep it under 250 characters. Highlight the key benefit or outcome for customers. - Calls to Action
Your Partner Manager will configure the primary call to action (CTA) button, which is the SafetyCulture lead form. Leads are emailed directly to your designated contacts. You may also request a secondary CTA linking to a landing page on your website. - Listing Logo
Upload your full brand logo, including both the wordmark and logomark. The recommended size is 600 × 350px with a transparent background in a PNG format.
Description
The Description section is required as it explains what your integration does and why it matters.
| Setup view | Customer view |
|---|---|
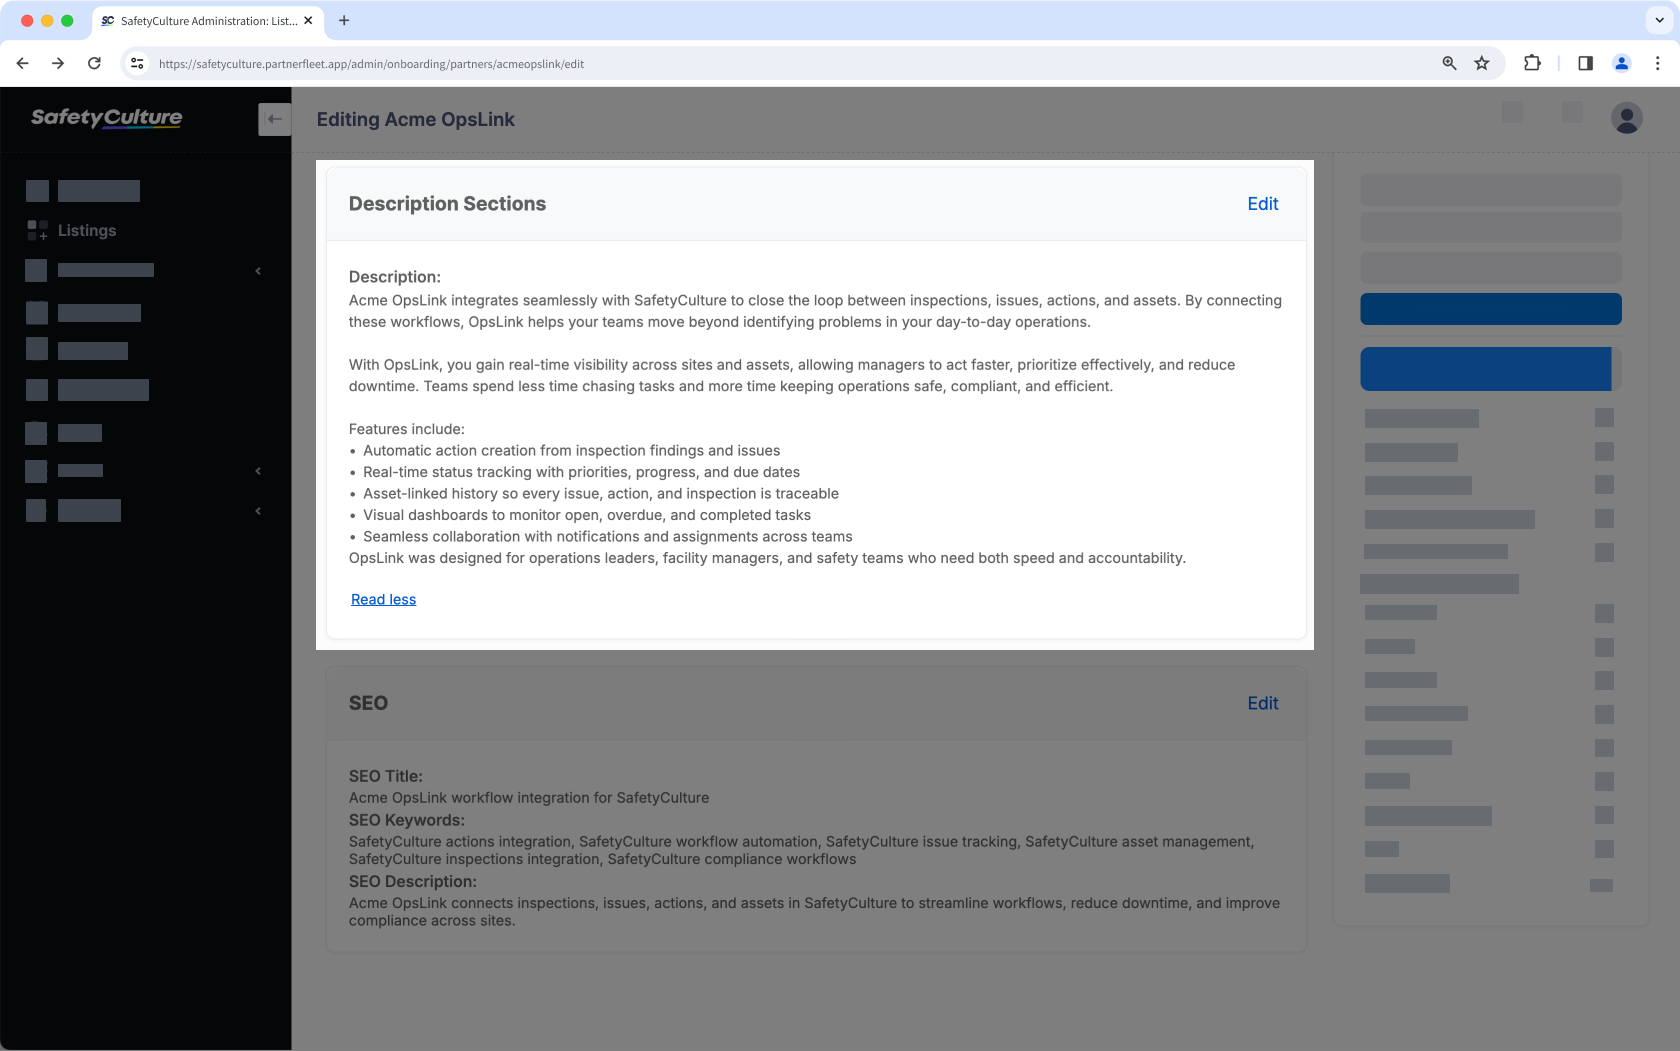 | 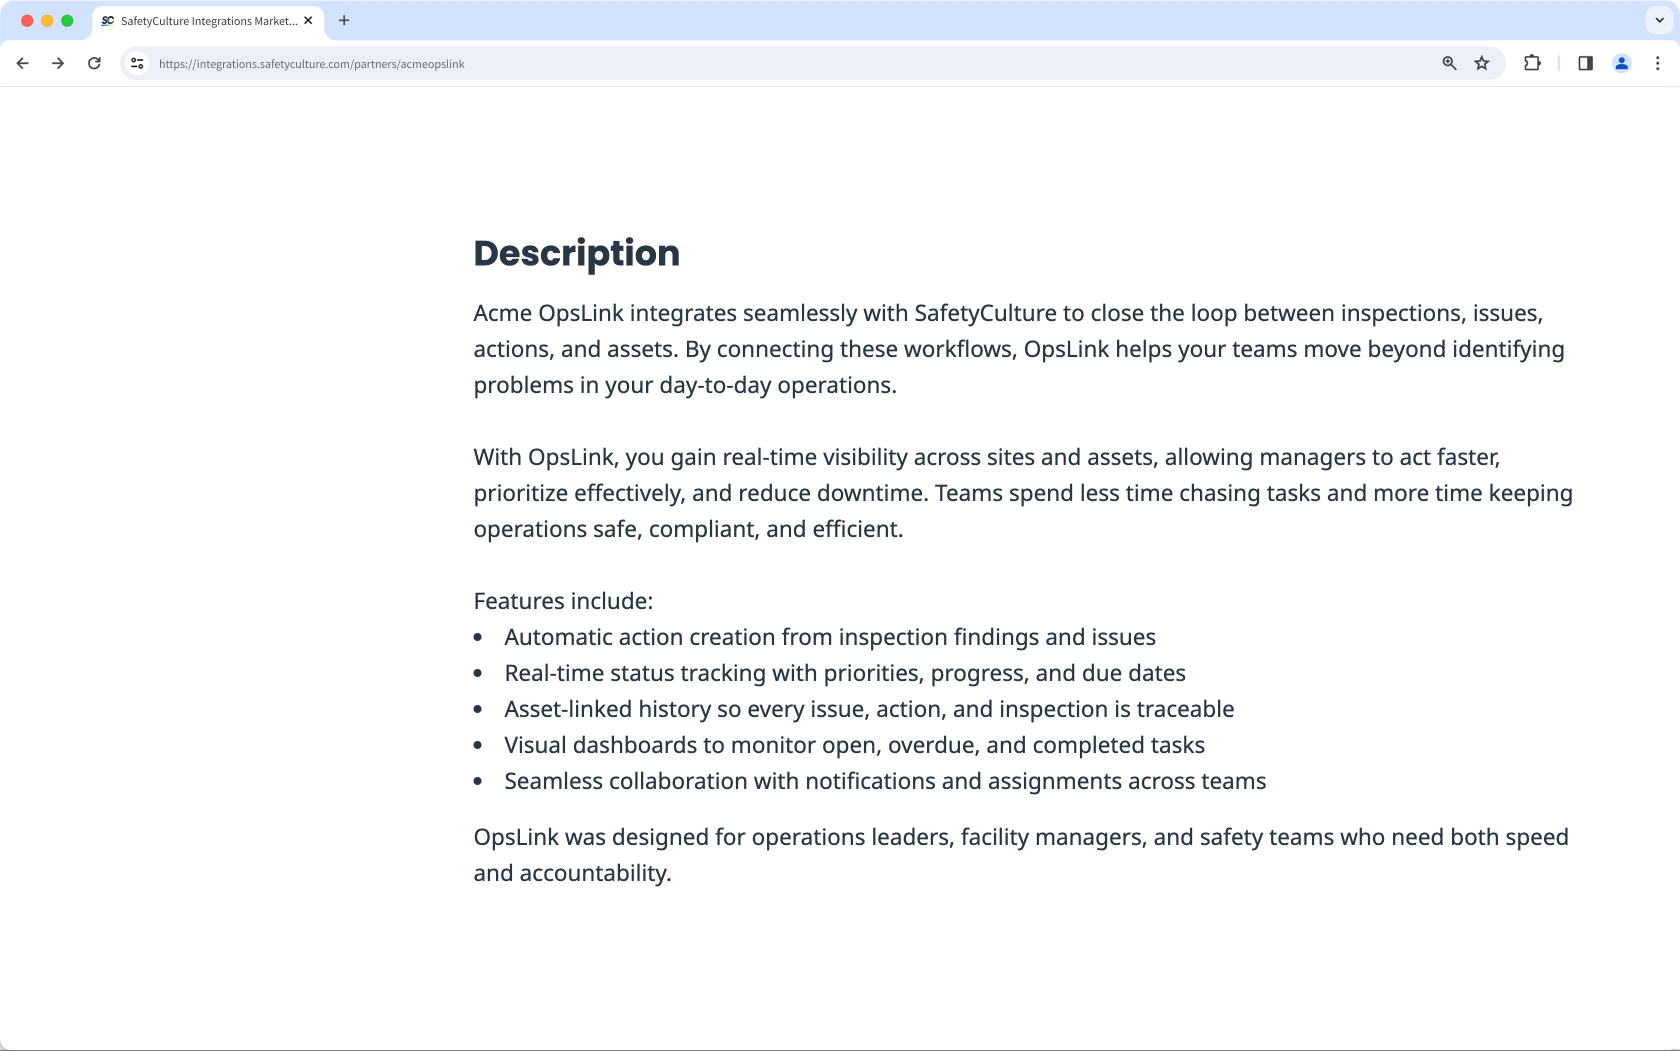 |
- Write a short paragraph that introduces your integration at a high level. Explain what it does and the main benefit it provides. Keep the tone straightforward and customer-focused, avoiding jargon or marketing fluff.
- Follow with a bulleted list of your integration’s most important features. Each point should describe a capability in clear, simple terms that highlight practical value.
- End with a sentence that reinforces who the integration is designed for or what makes it valuable overall. This helps customers see if it applies to their role, industry, or market. If your integration is only available in a specific geography, state this clearly in the closing sentence.
SEO
The SEO section makes your listing easier to discover in search engines and in the SafetyCulture Integrations pages. Your Partner Manager will configure these fields for you, using the details you provide in your listing to ensure your integration is represented clearly and accurately.
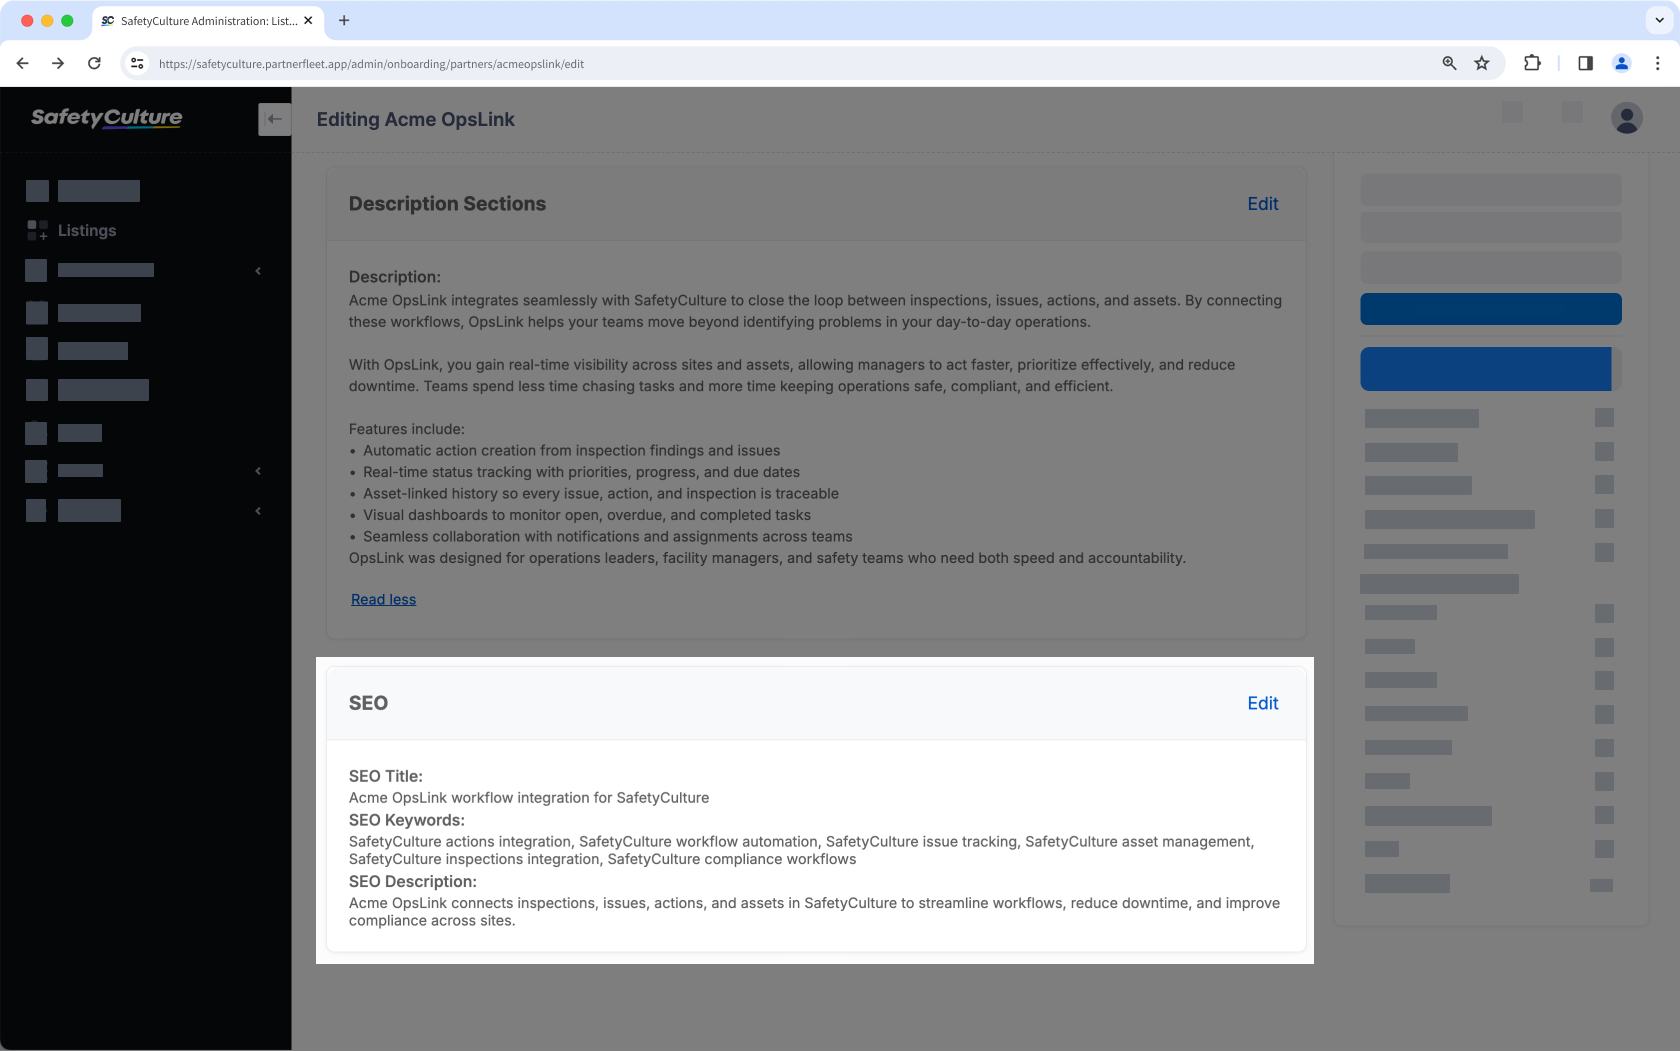
- SEO Title
We create a headline that appears in search engine results and at the top of the browser tab. This includes your integration name and a key function or value. Titles are specific and kept under 60 characters. - SEO Description
We write a short summary of about 150-160 characters that appears under the title in search results and describes your integration’s value. The focus is on customer outcomes rather than technical details or marketing jargon.
Additional Details
The Additional Details section appears in the sidebar of your listing. These fields provide customers with essential information about access, support, and your company.
| Setup view | Customer view |
|---|---|
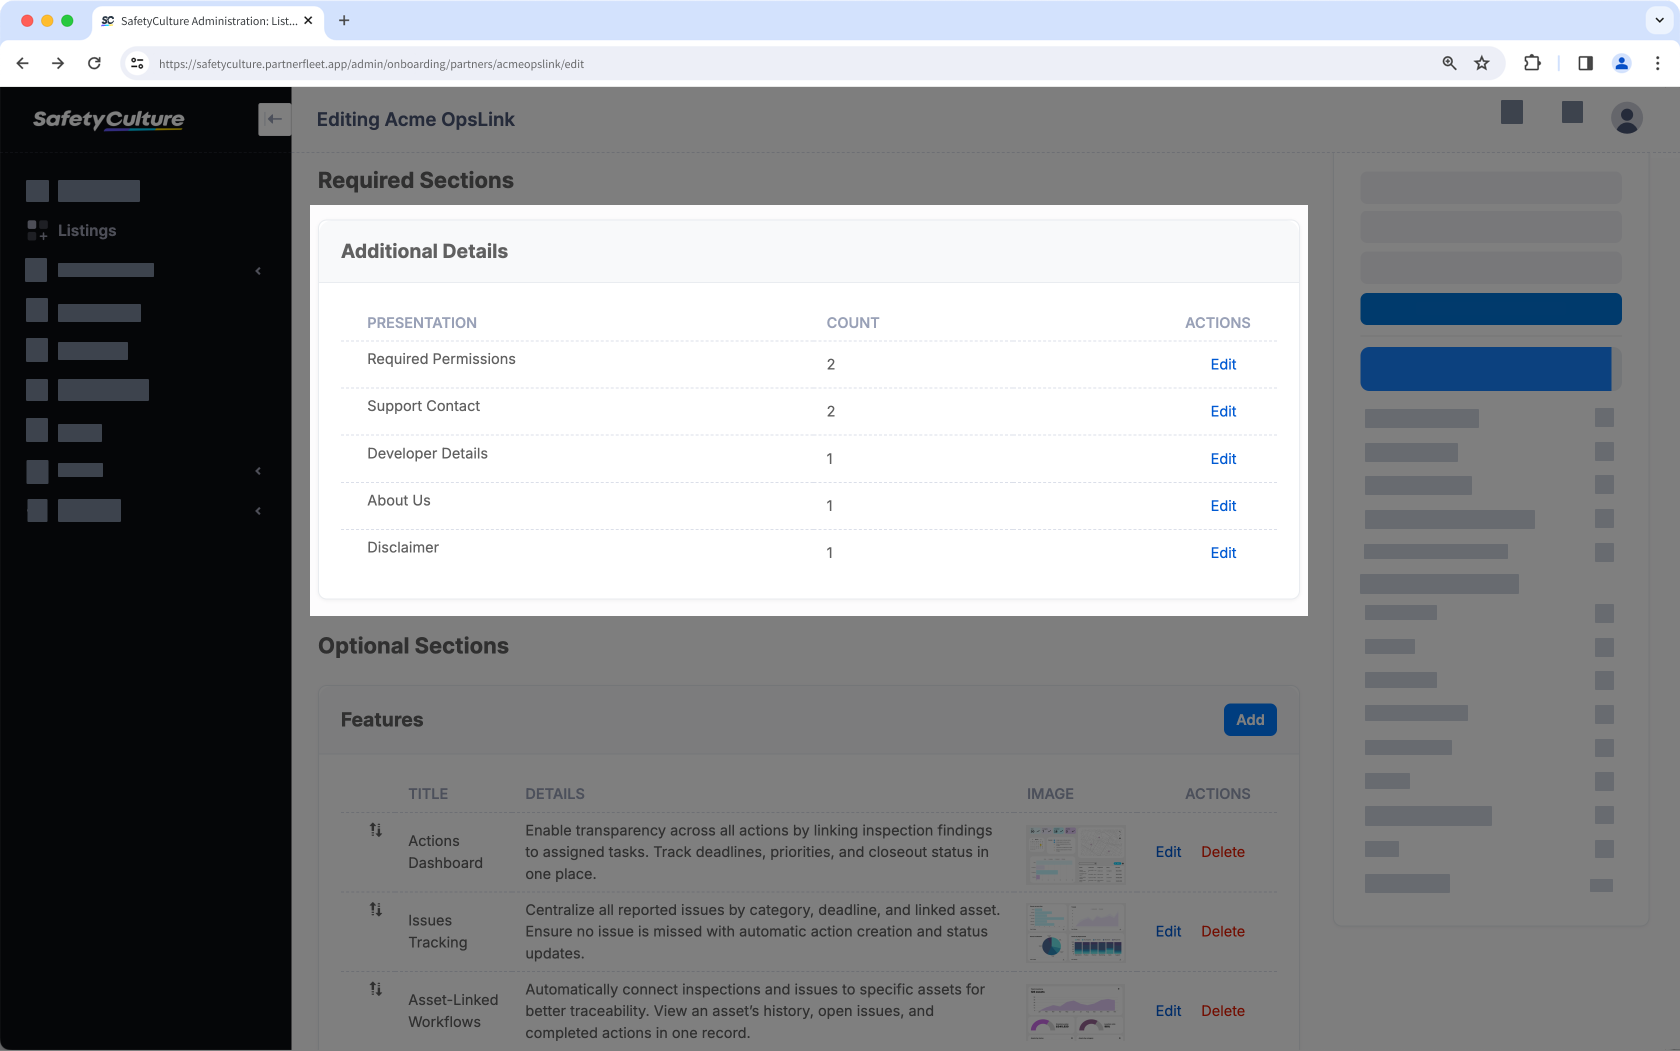 | 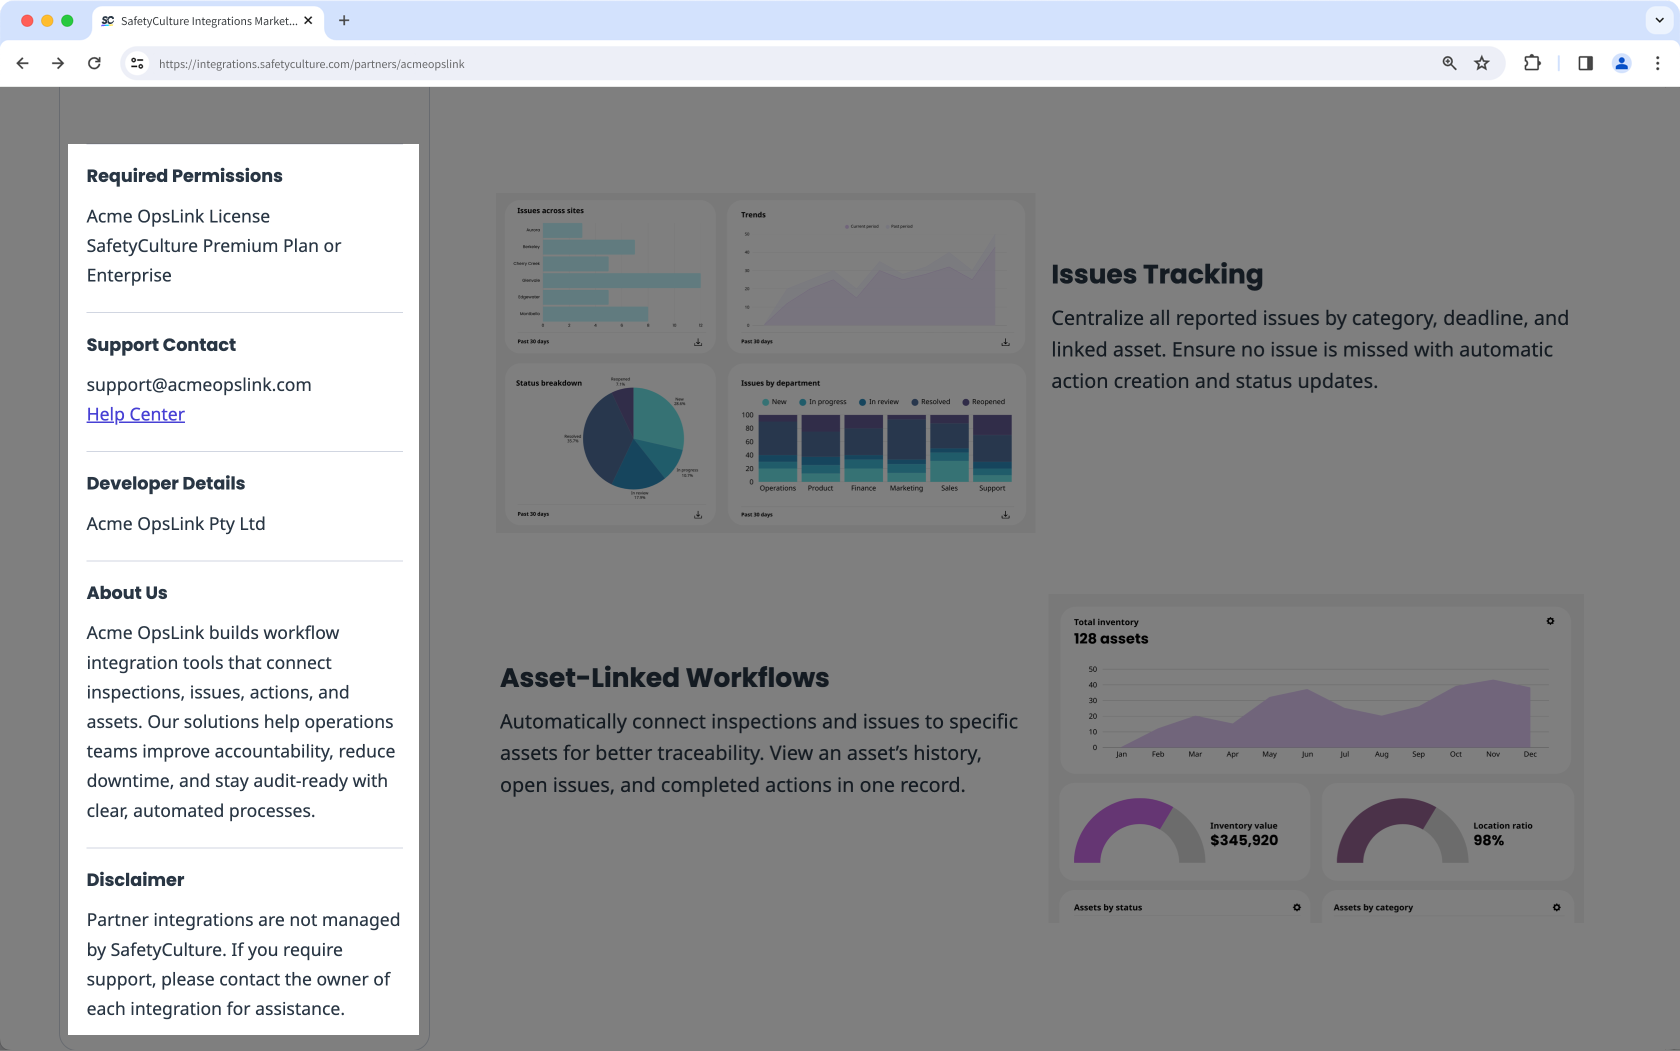 |
- Required Permissions
List any permissions, modules, or product tiers needed to use your integration. Only include requirements from your product. - Support Contact
Provide a direct way for customers to reach your support team. This can be an email address or a support portal where customers can log tickets. A knowledge base link may be included for reference. - Developer Details
Enter your company name exactly as it should appear to customers. This helps customers confirm who created and maintains the integration. - About Us
Write a short description of your company. Focus on what you do, your expertise, or how you serve customers. Keep it under 400 characters and do not add a link in this section. - Disclaimer
SafetyCulture provides a standard disclaimer that appears on all partner listings. This text clarifies that integrations are managed by the partner, not by SafetyCulture, and directs customers to contact the integration owner for support.
Features
The Features section is optional but highly recommended. It appears at the top of your listing, above the Description section, and gives customers a quick view of the most valuable functionalities your integration offers. Each feature requires a title, details, and an image.
| Setup view | Customer view |
|---|---|
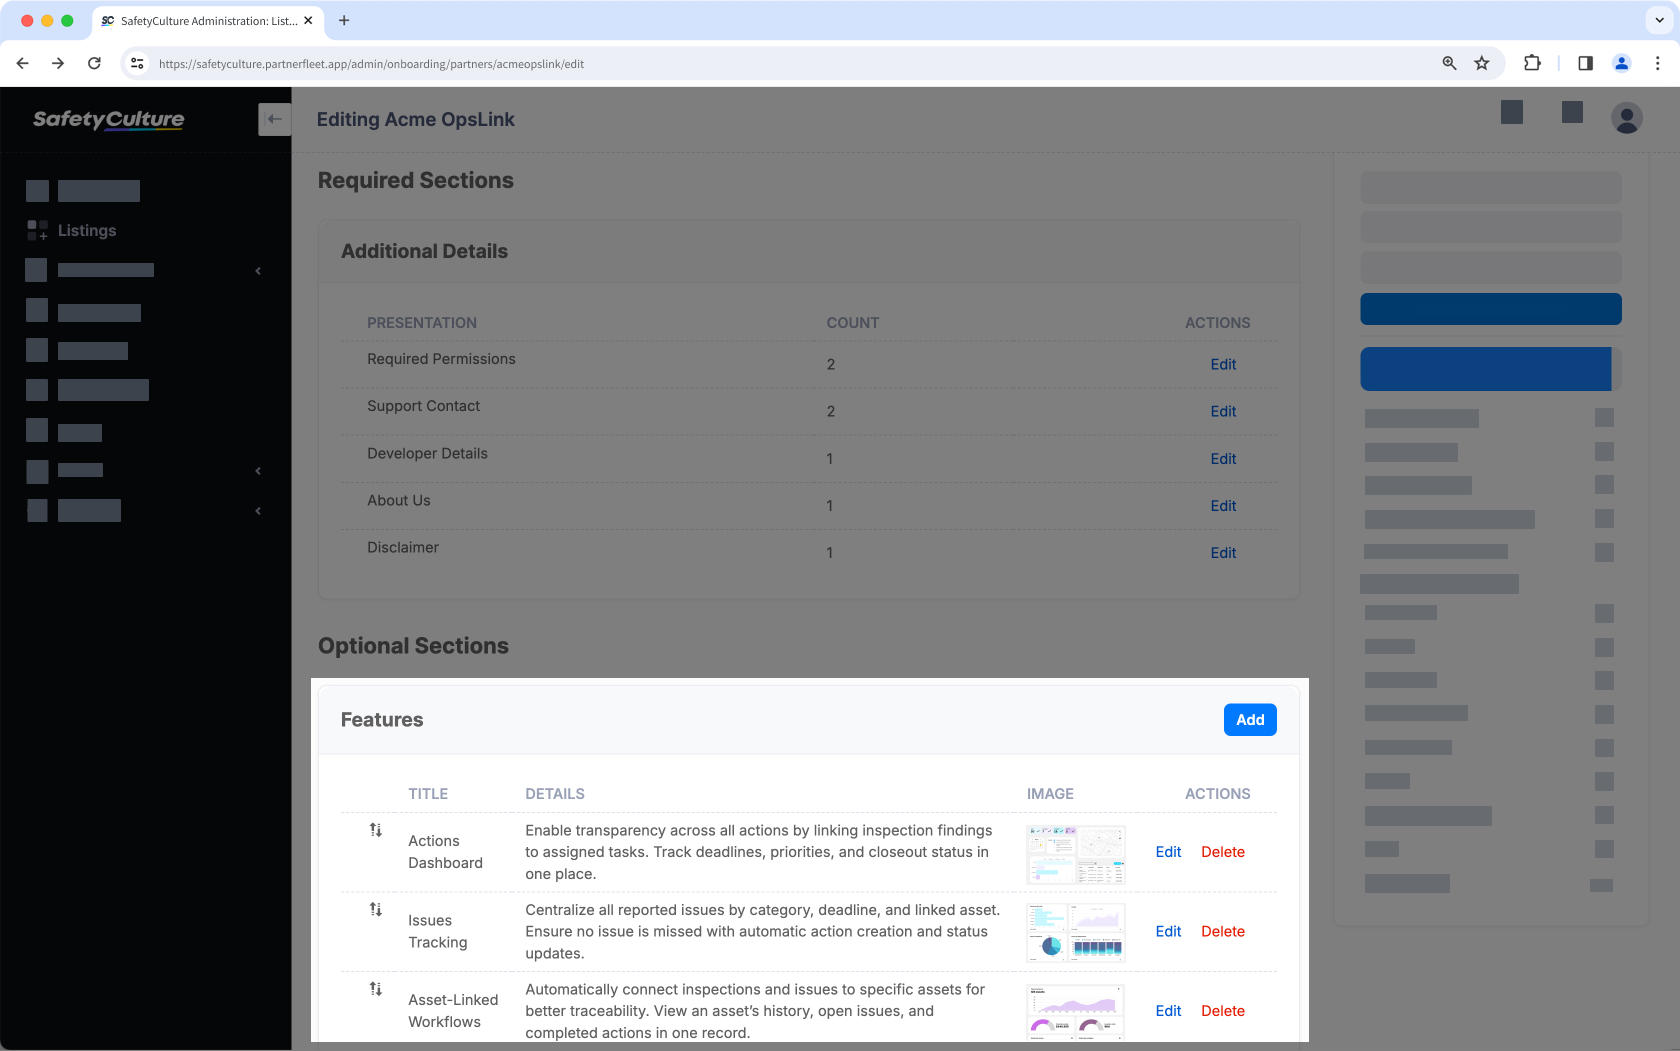 | 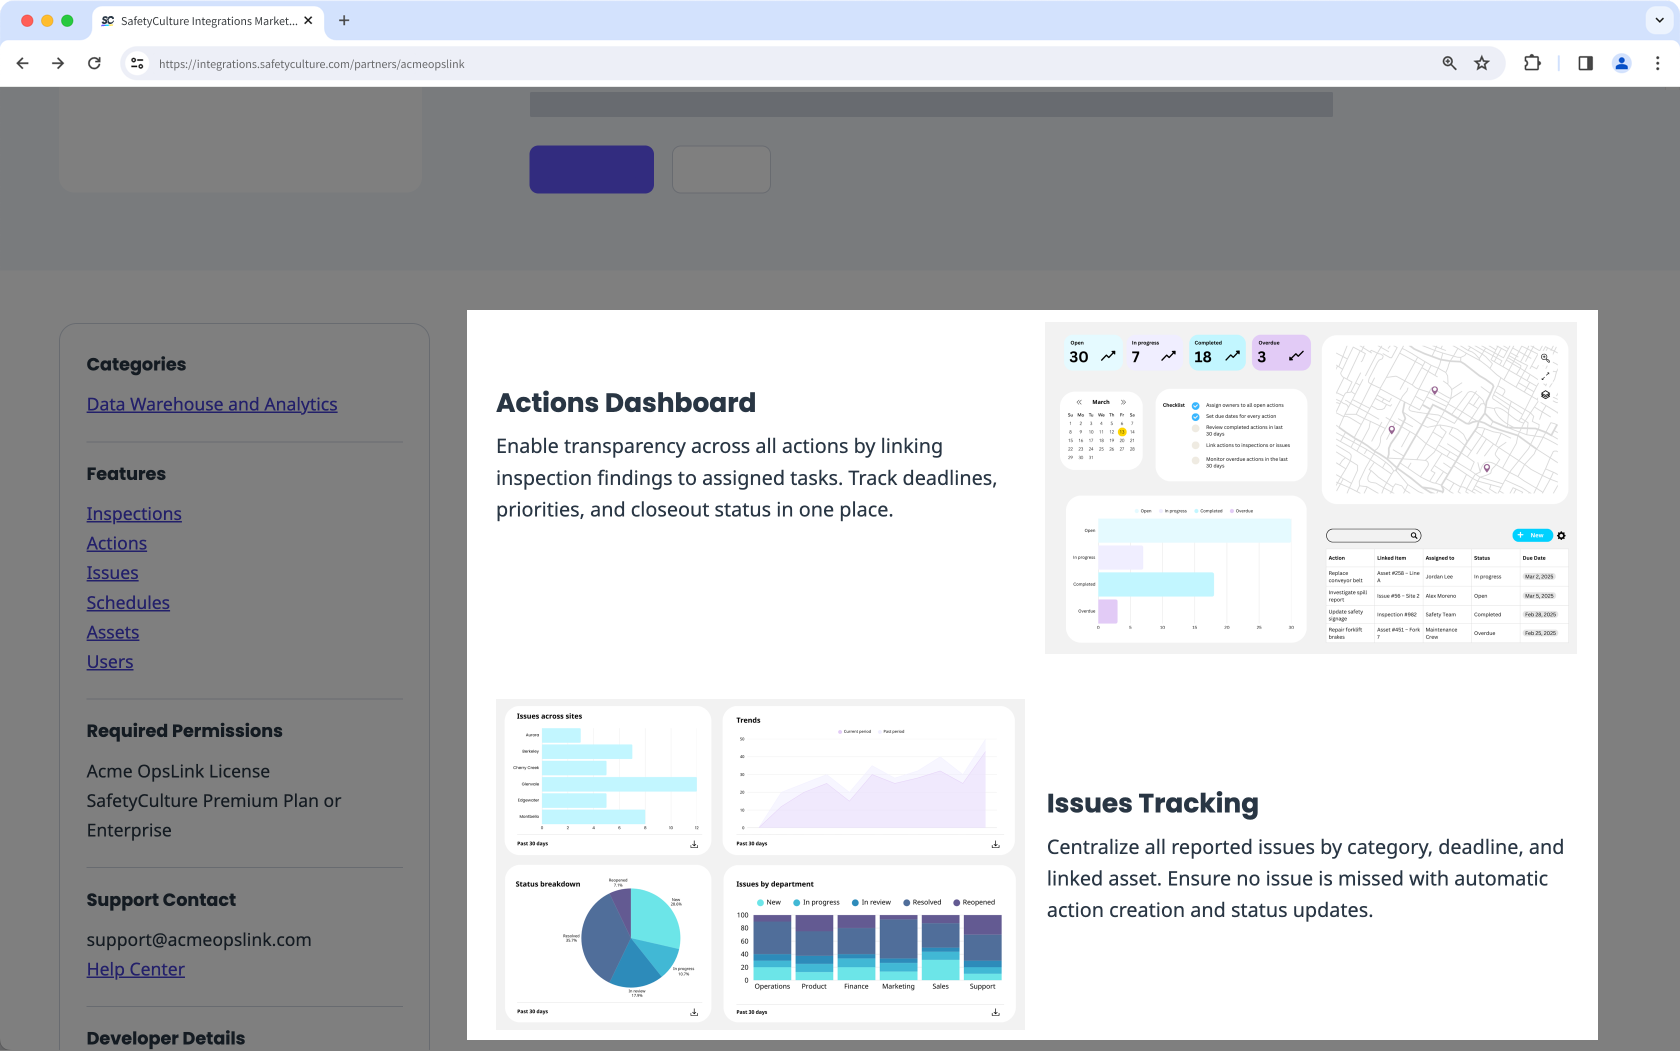 |
- Title
Provide a short, descriptive name for the feature. Use customer-friendly terms rather than internal product labels, and keep formatting consistent. For example, “Issues Tracking,” not “issues tracking”. - Details
Write one or two sentences that explain what the feature does and focus on the outcome or customer benefit. - Image
Add a high-quality image that clearly represents the feature and showcases the value of your product. Use images around 700 × 1024px for the best display.
If you include multiple features, make sure all images are uniform in size and style so your listing looks consistent and professional.
Media
The Media section is optional but strongly recommended to showcase your integration with visuals that help customers quickly understand its value.
| Setup view | Customer view |
|---|---|
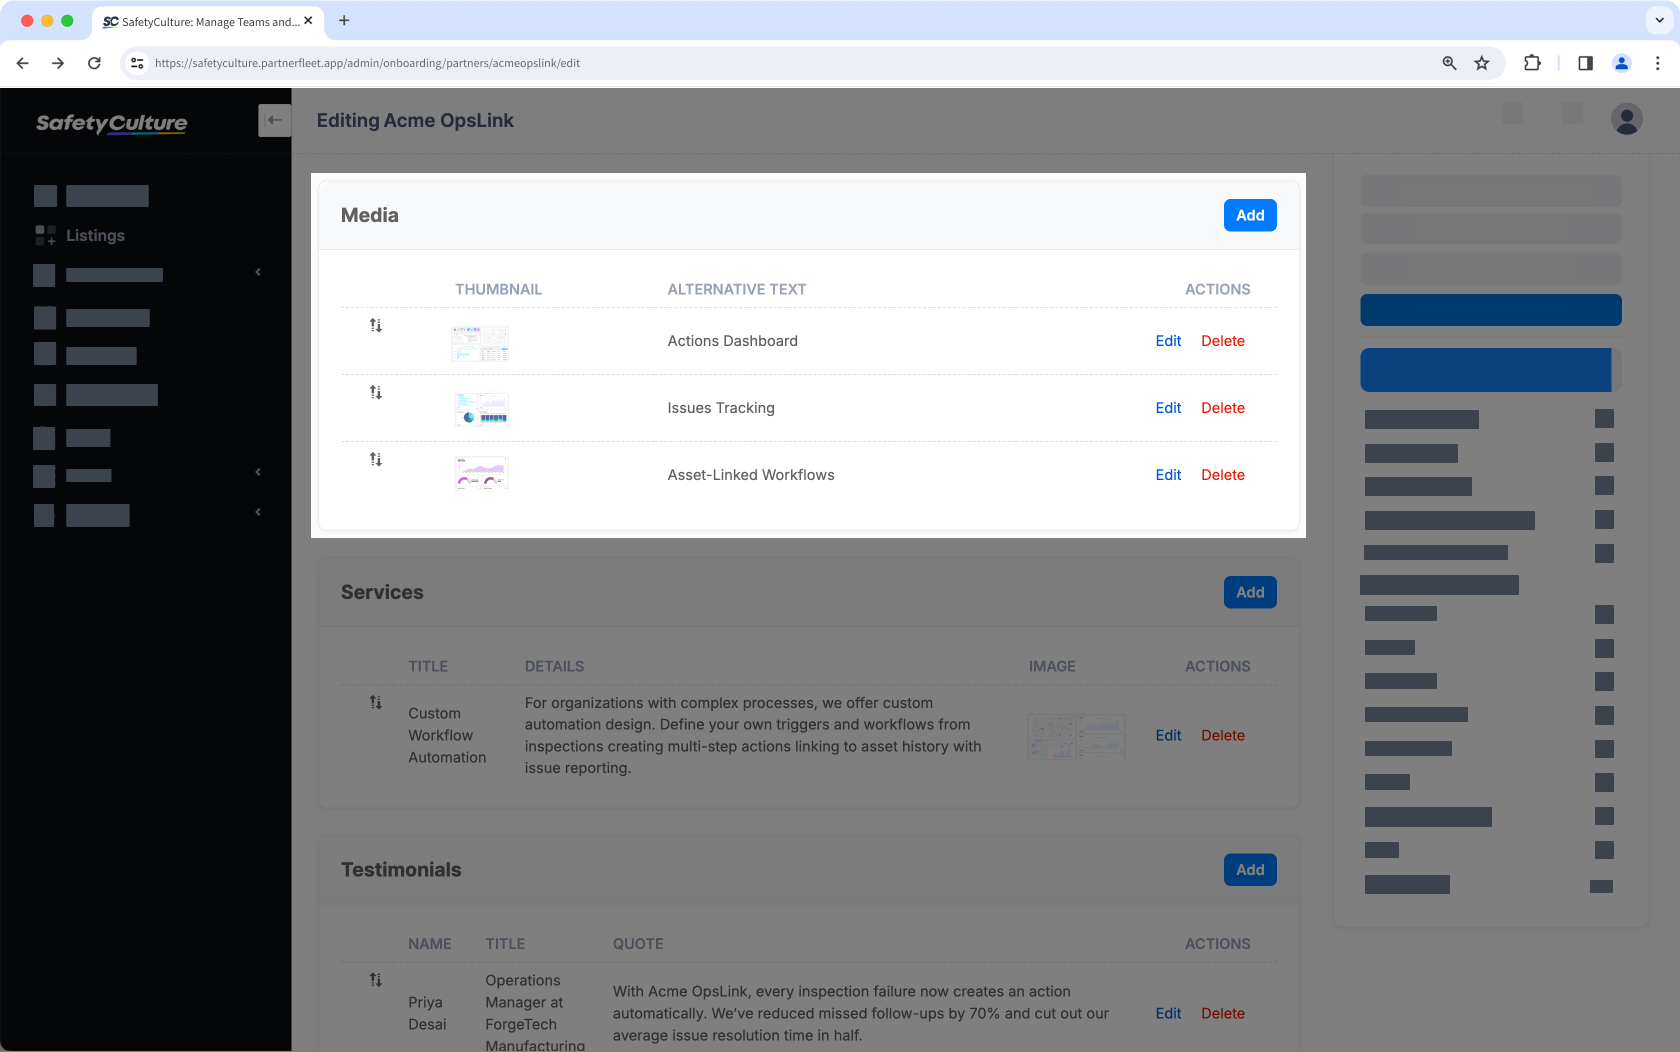 | 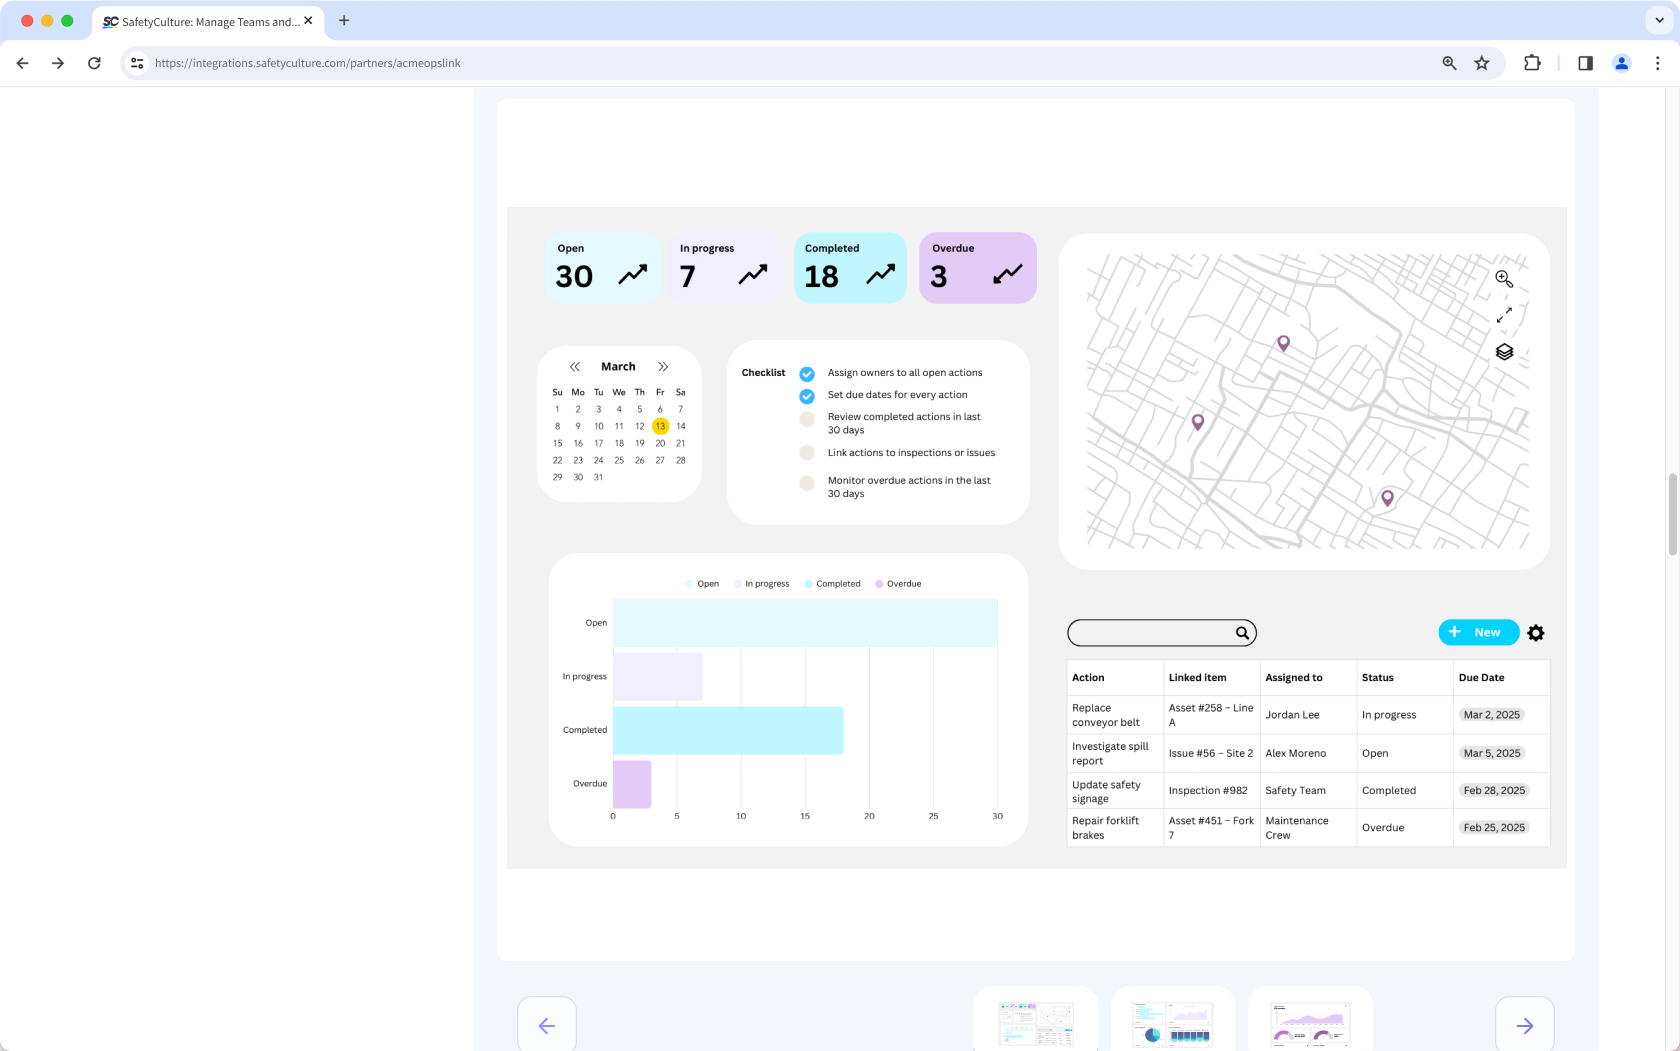 |
- Images
Add high-quality images with a minimum height of 600px. Size all images consistently to create a clean and professional gallery. - Videos
Lead with a short, engaging video if you have one. Videos can be hosted on YouTube, Vimeo, or similar platforms that's publicly available.
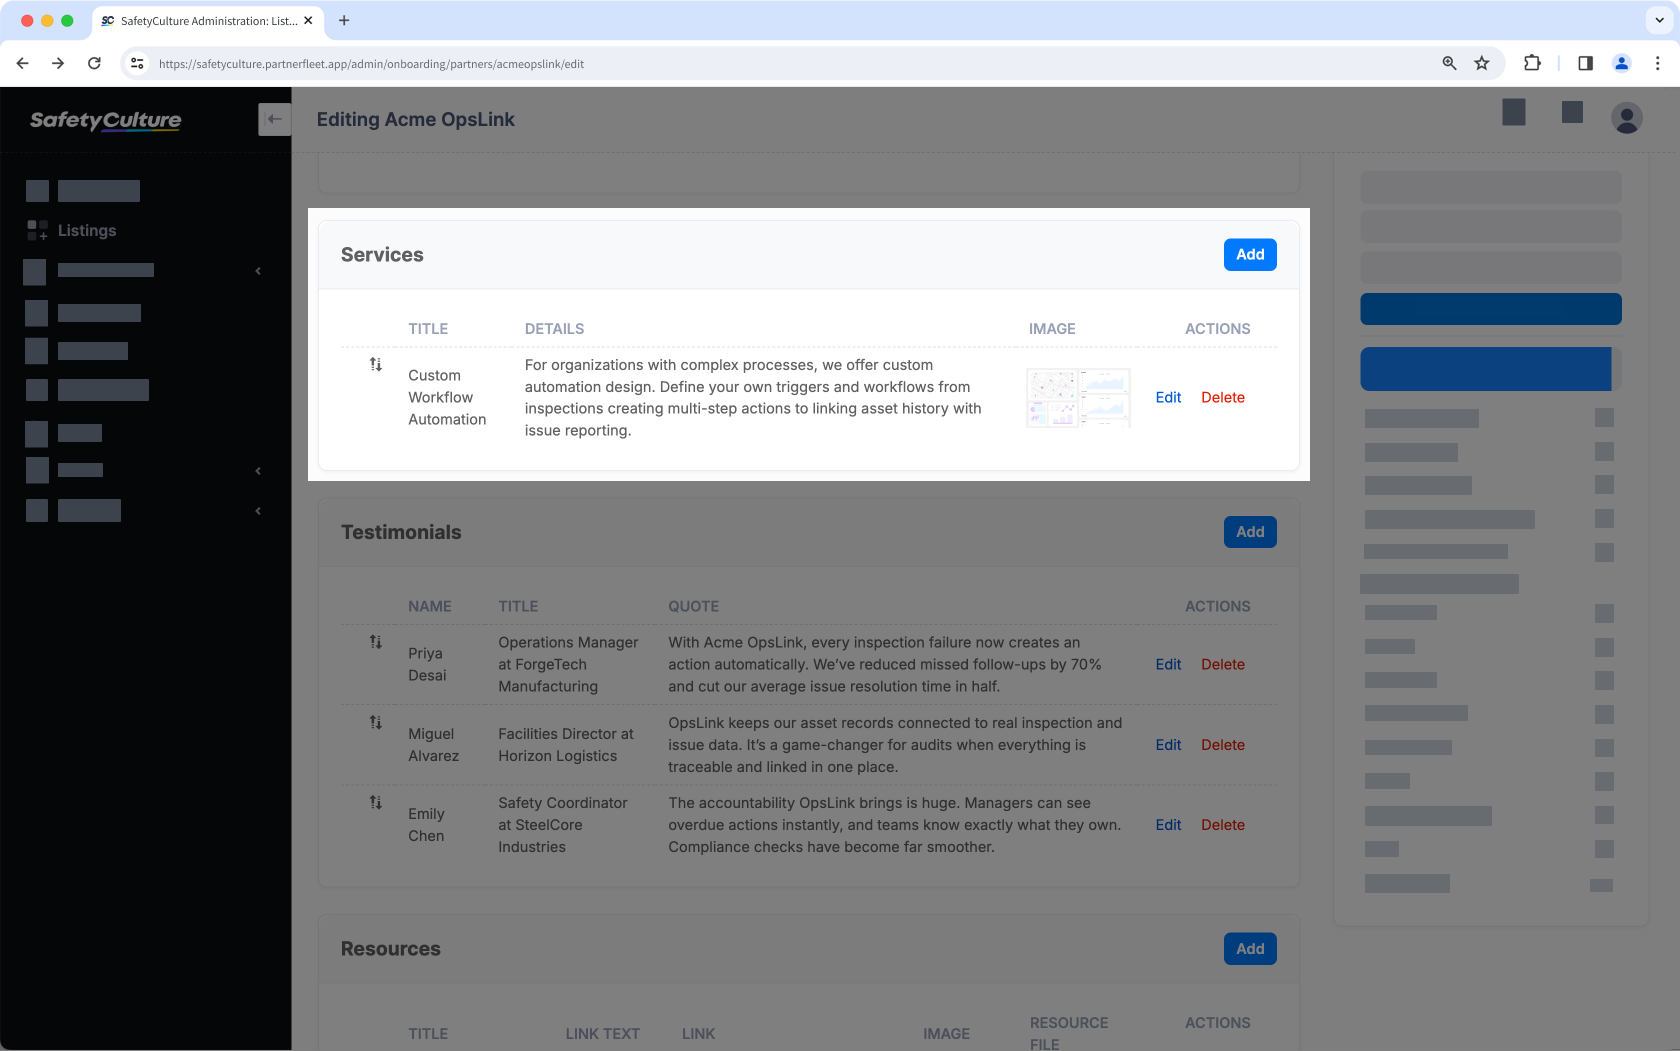
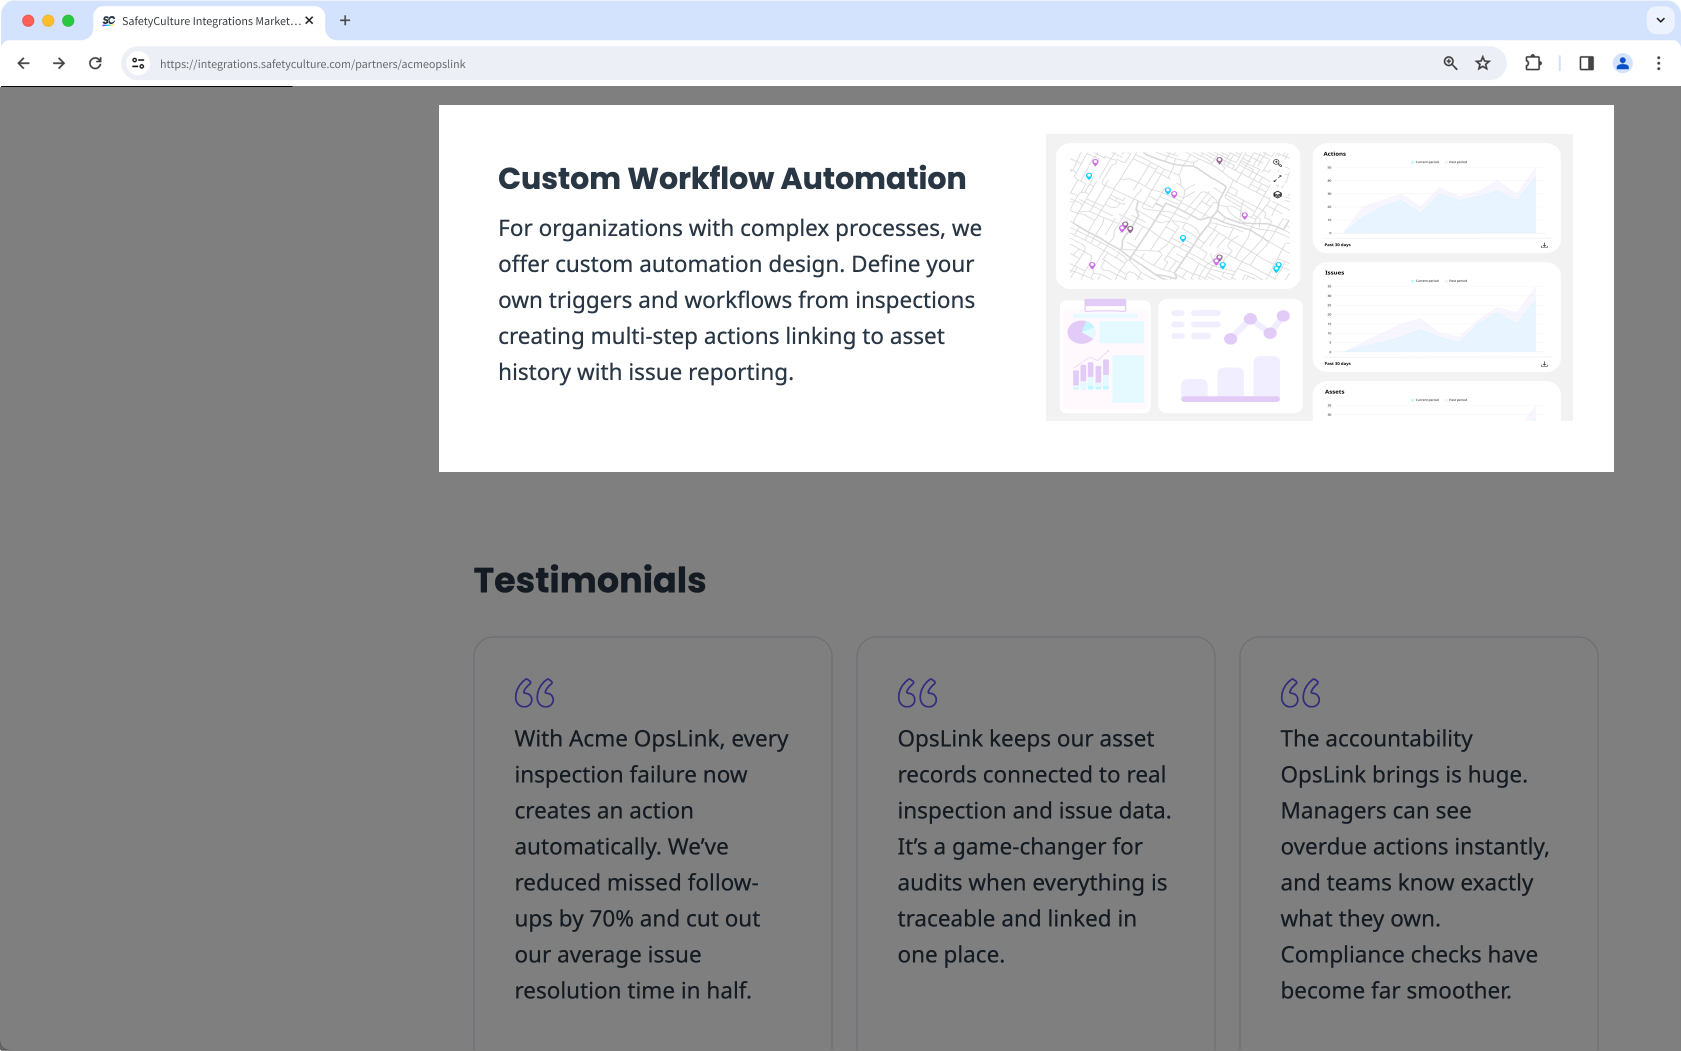
Services
The Services section allows you to showcase additional services that support your integration, such as customization, implementation, or advanced support. It helps customers understand the extra value your company can provide beyond the integration itself.
| Setup view | Customer view |
|---|---|
 |  |
- Title
Provide a short, descriptive name for the service. Use customer-friendly terms rather than internal product labels, and keep formatting consistent. For example, “Custom Workflow Automation,” not “CWA Package”. - Details
Describe the service in one or two sentences. Focus on what the customer gains from it, such as tailored configuration, setup support, or specialized design. - Image
Add a high-quality image that clearly represents the service. Use compelling graphics or screenshots that show the service in action, and with around 700 × 1024px for the best display. Size all images consistently to create a clean and professional gallery.
Testimonials
The Testimonials section is optional but highly recommended. It gives your own customers a chance to explain the value of your integration in their own words. Strong testimonials add credibility and trust, showing real-world results from real users. Each testimonial includes a name, title, quote, and image.
You must have the permission of the person or company providing the testimonial to publish it on the SafetyCulture Integrations Marketplace. SafetyCulture may request evidence of approval from your customer before a testimonial goes live.
| Setup view | Customer view |
|---|---|
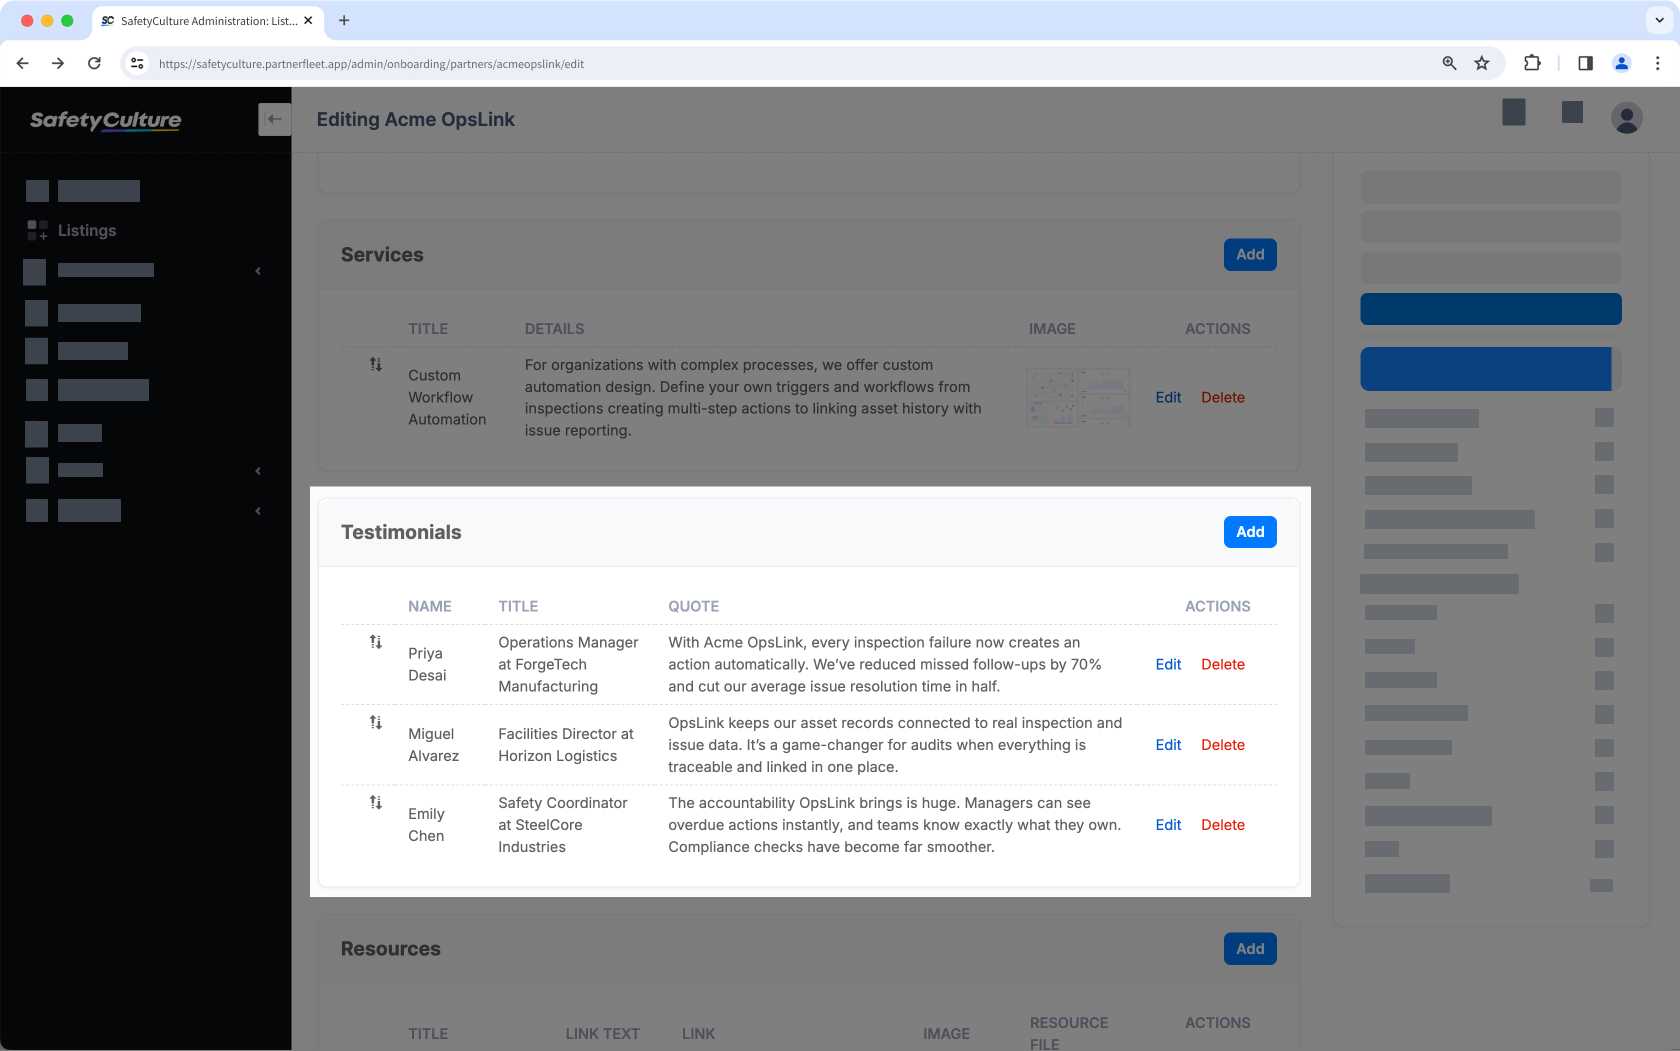 | 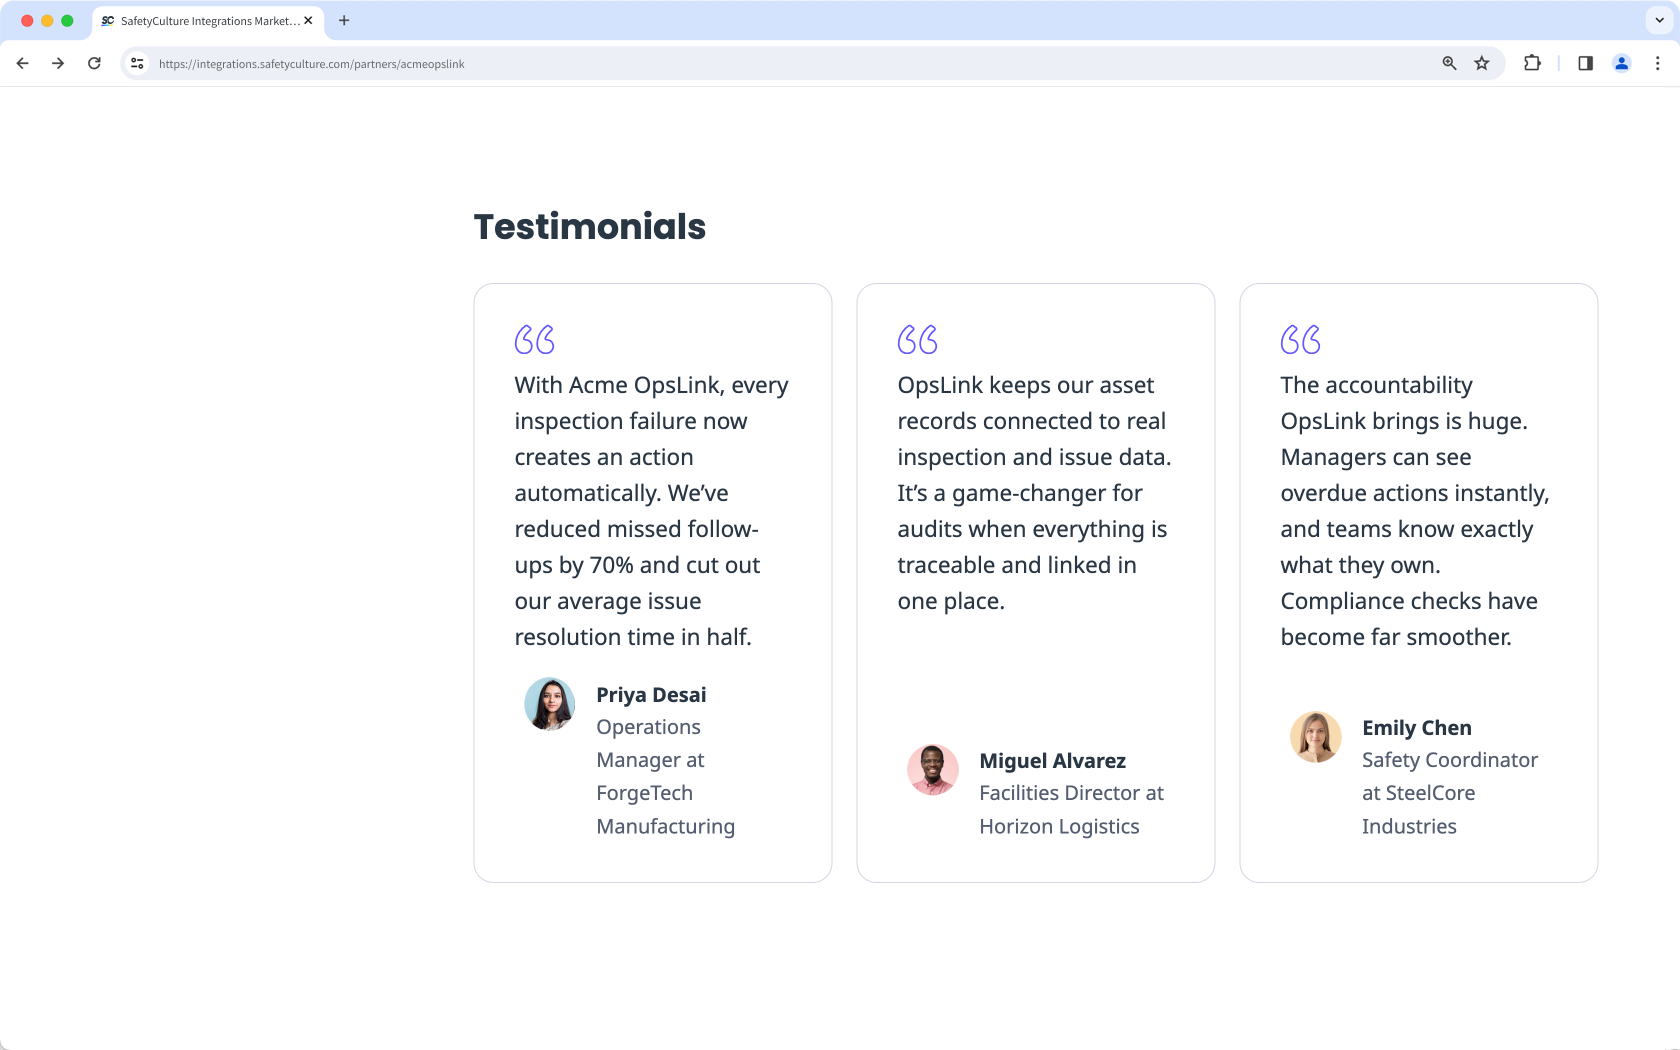 |
- Name
Enter the full name of the person providing the testimonial. If the testimonial is from a company rather than an individual, use the company name. - Details
Add the role or job title of the person giving the testimonial. This helps customers understand the perspective and authority behind the feedback. For example, “Operations Manager at ForgeTech Manufacturing”. - Quote
Provide a short, impactful statement in the customer’s own words that highlights the value of your integration. Keep it concise at one to three sentences with a focus on results or benefits. - Image
Upload a photo of the person or a company logo using a 1:1 square ratio. Acceptable formats are either a cropped headshot (portrait/landscape adjusted to square) or a logo. Use clear, professional images without clutter or text overlays.
Resources
The Resources section allows you to share supporting material like case studies, whitepapers, or reports that serve as supplementary information for your potential customers.
| Setup view | Customer view |
|---|---|
 | 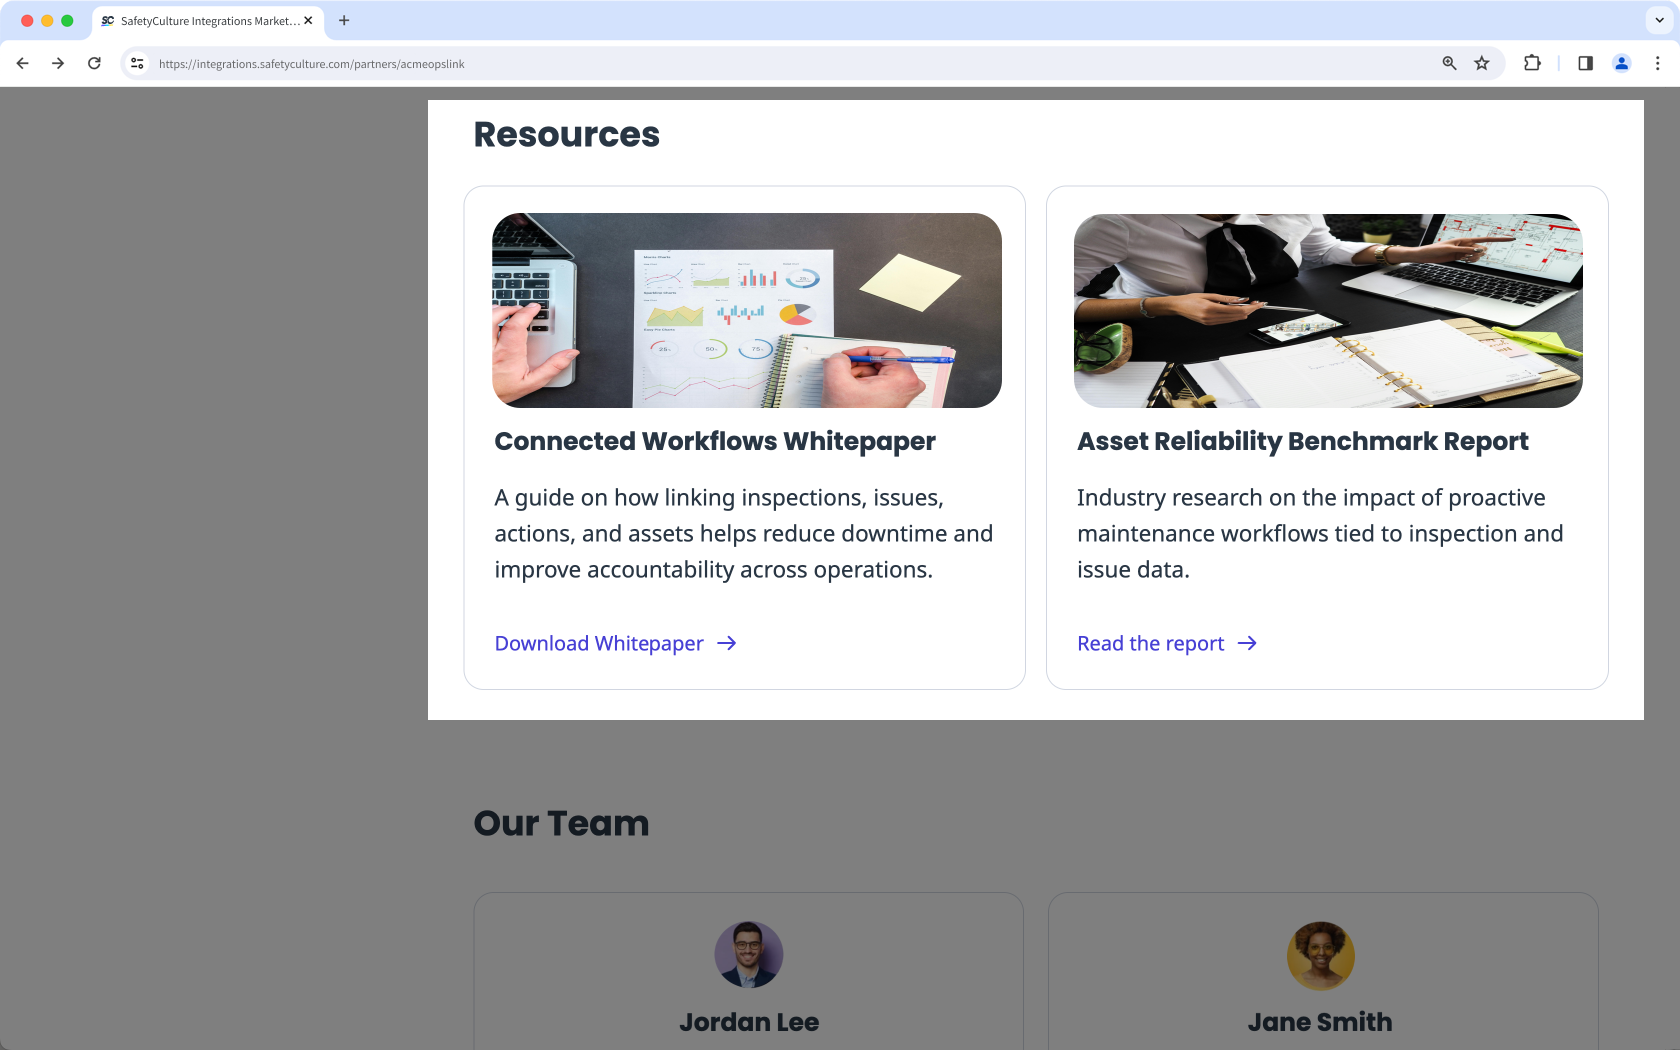 |
- Title
Write a clear, descriptive title for your resource. Keep it concise so customers know at a glance what the material is. For example, "Asset Reliability Benchmark Report". - Link text
Use short, action-oriented text that tells customers what they’ll get when they click. For example, "Read the report". - Link
Provide either public URL or file upload that's live, accessible, and directly related to the resource. - Image
Add an image that represents the resource. Use a minimum size of 485 × 260px for the best display.
Team
The Team section is optional but helps build trust by showcasing the people behind your integration.
| Setup view | Customer view |
|---|---|
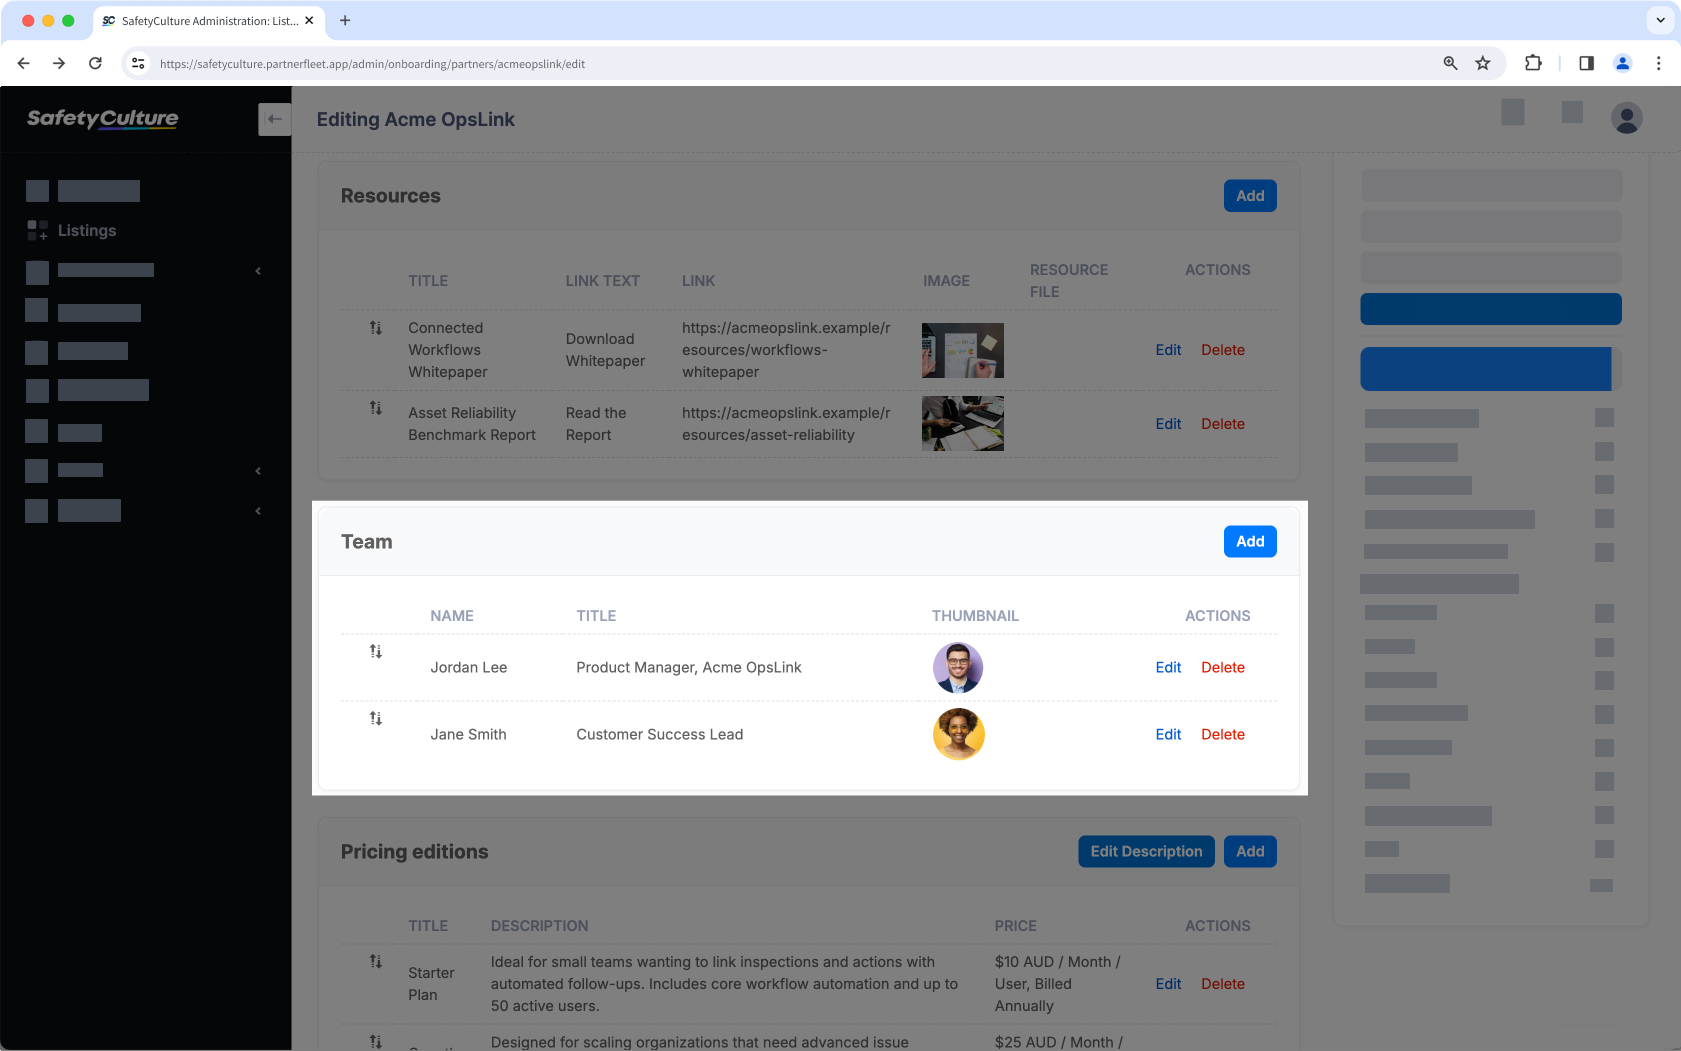 | 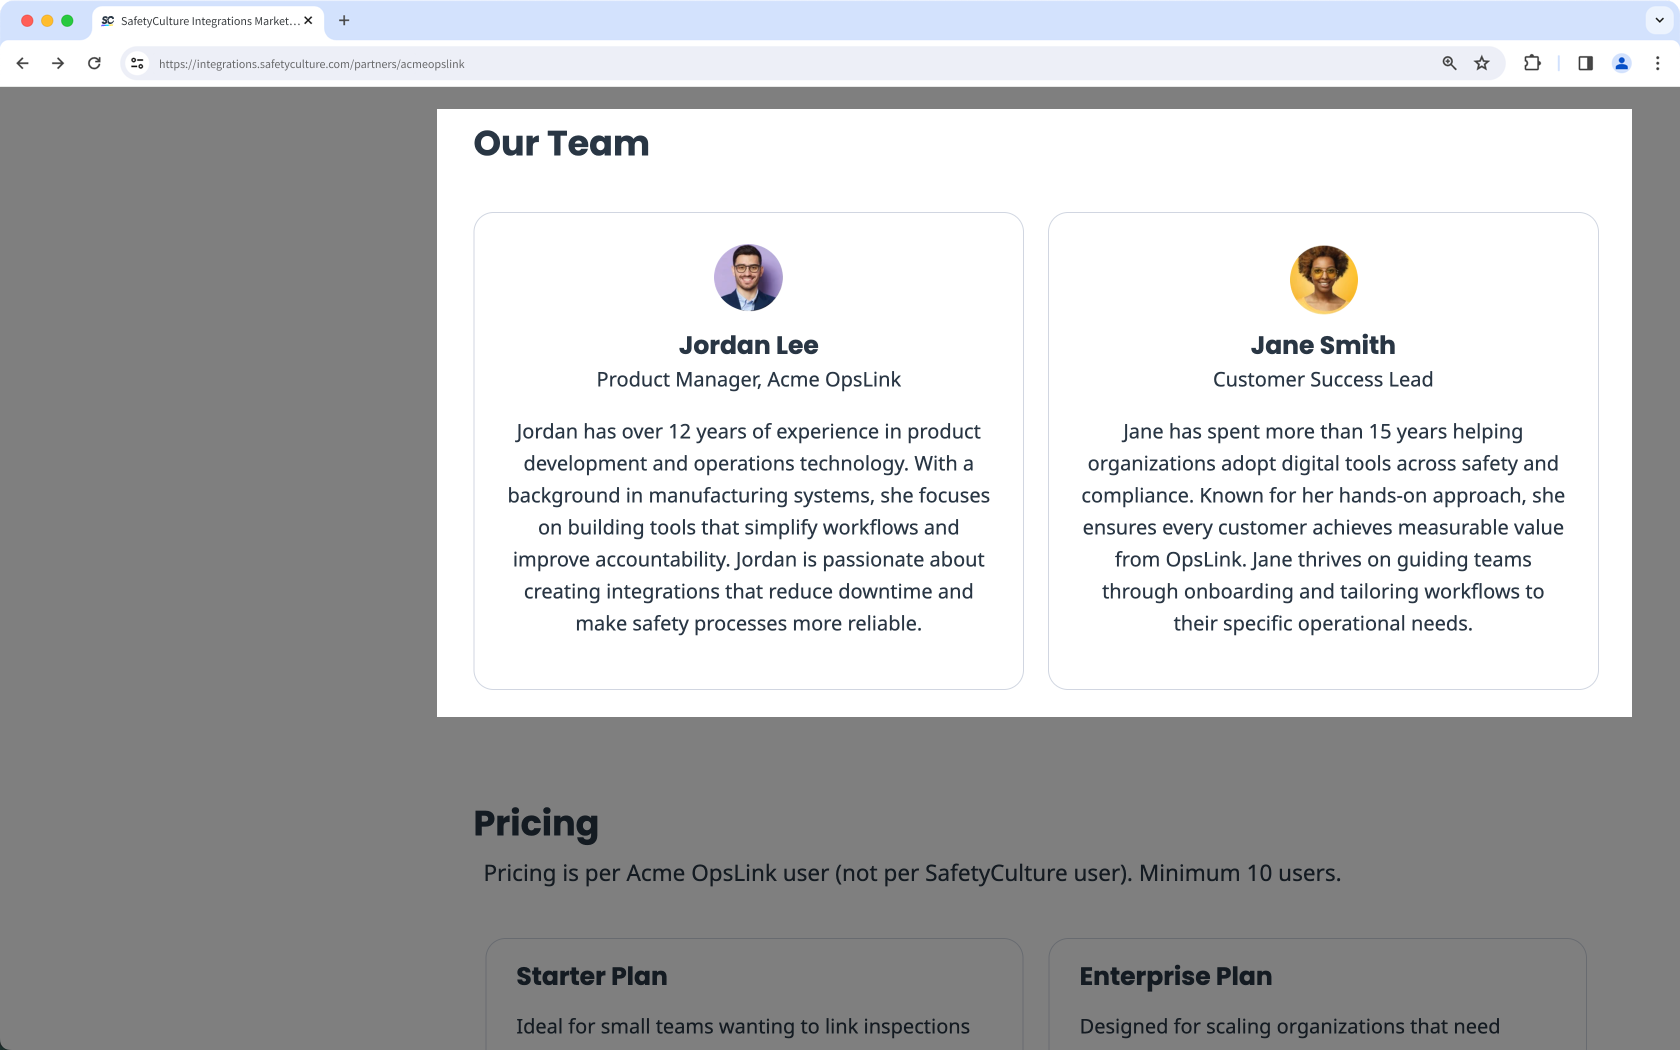 |
- Name
Enter the full name of the team member. Keep formatting consistent (for example, first and last name). - Title
Add the person’s current role in your company. This gives context for their contribution and authority. - Bio
Write a short paragraph (2–3 sentences) describing the team member’s expertise, experience, and contribution to the integration. Focus on how their skills support customer success. - Image
Upload a photo of the person or a company logo using a 1:1 square ratio. Acceptable formats are either a cropped headshot (portrait/landscape adjusted to square) or a logo. Use clear, professional images without clutter or text overlays. - Web link
You have the option to provide a link where customers can learn more about the team member, such as a LinkedIn profile, team page, or personal website.
Pricing Editions
The Pricing Editions section is an optional and allows you to share different plans or tiers for your integration.
| Setup view | Customer view |
|---|---|
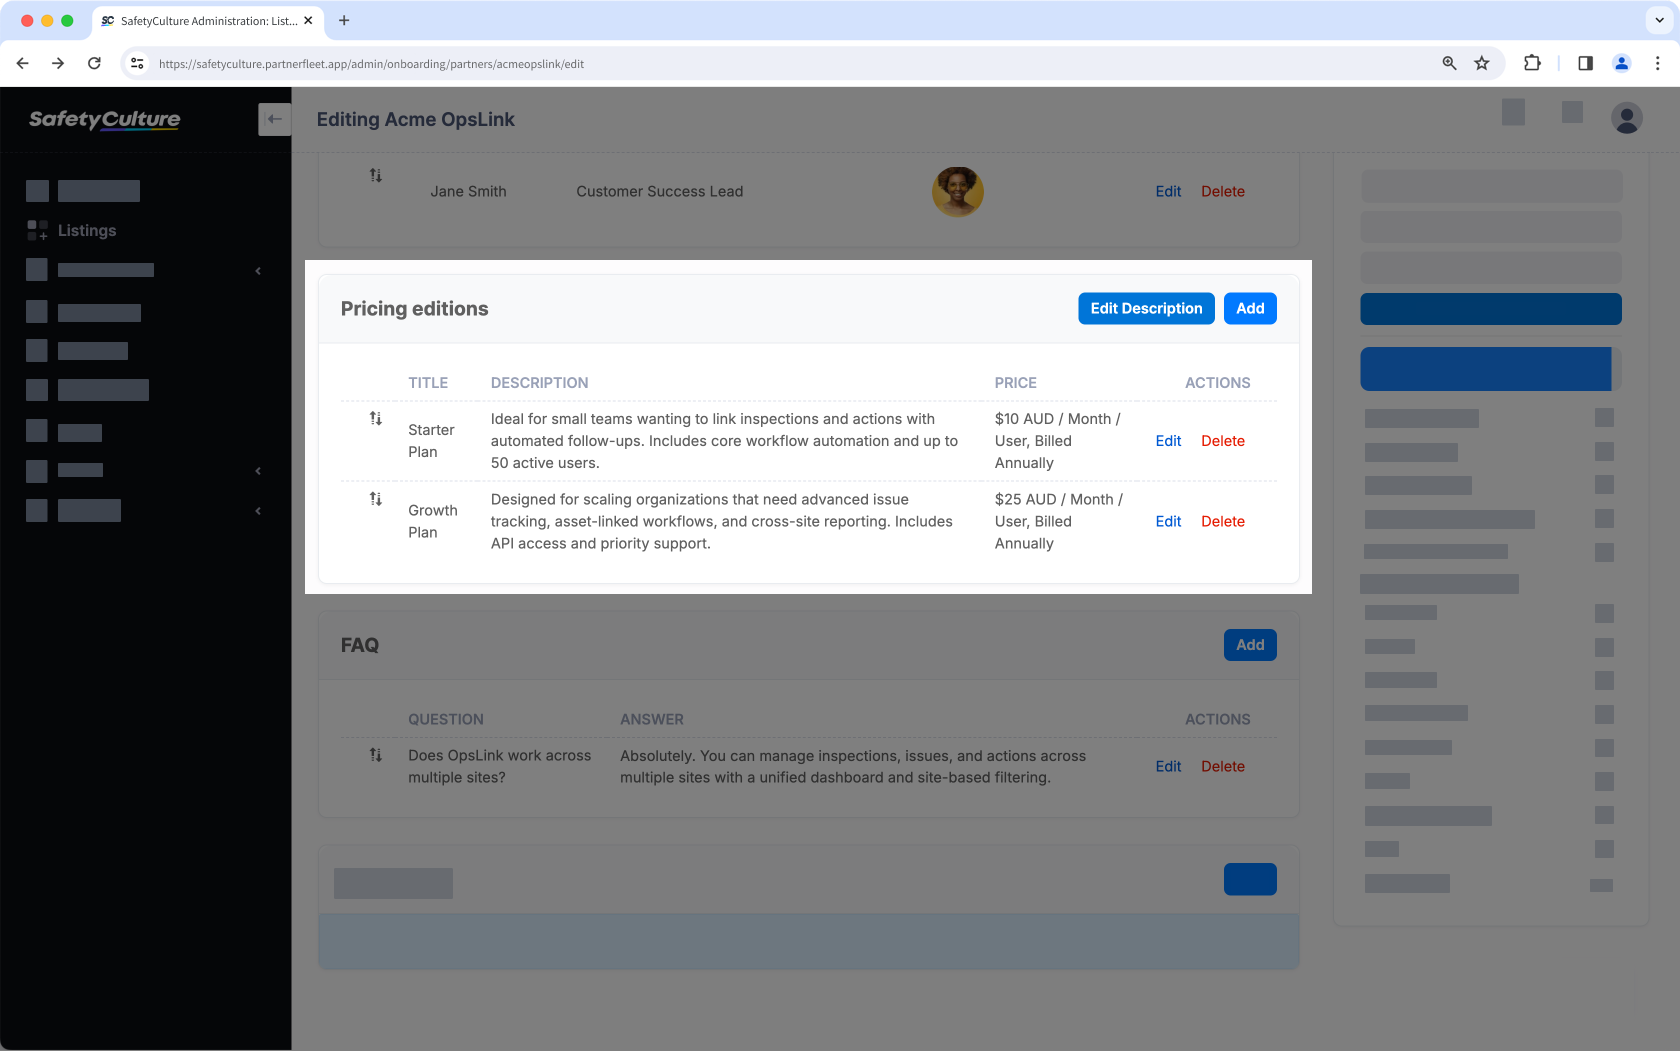 | |
- Title
Enter the plan name. - Description
Write 1–2 sentences that summarize what the plan includes and who it is best for. Highlight the key features or benefits without overwhelming detail. - Price
Enter the cost clearly, including the currency and billing cycle. For example, "$25 USD / user / month, billed annually". If you offer a free trial, disclose the ongoing price after it ends.
For tiers like Custom or Enterprise, use “Price on application” or “Contact us.” Keep price format consistent across tiers so customers can easily compare their options.
FAQ
The FAQ section is optional but helpful for addressing common customer questions at the bottom of your listing. Use it to provide quick clarifications on setup, availability, or scope of use.
| Setup view | Customer view |
|---|---|
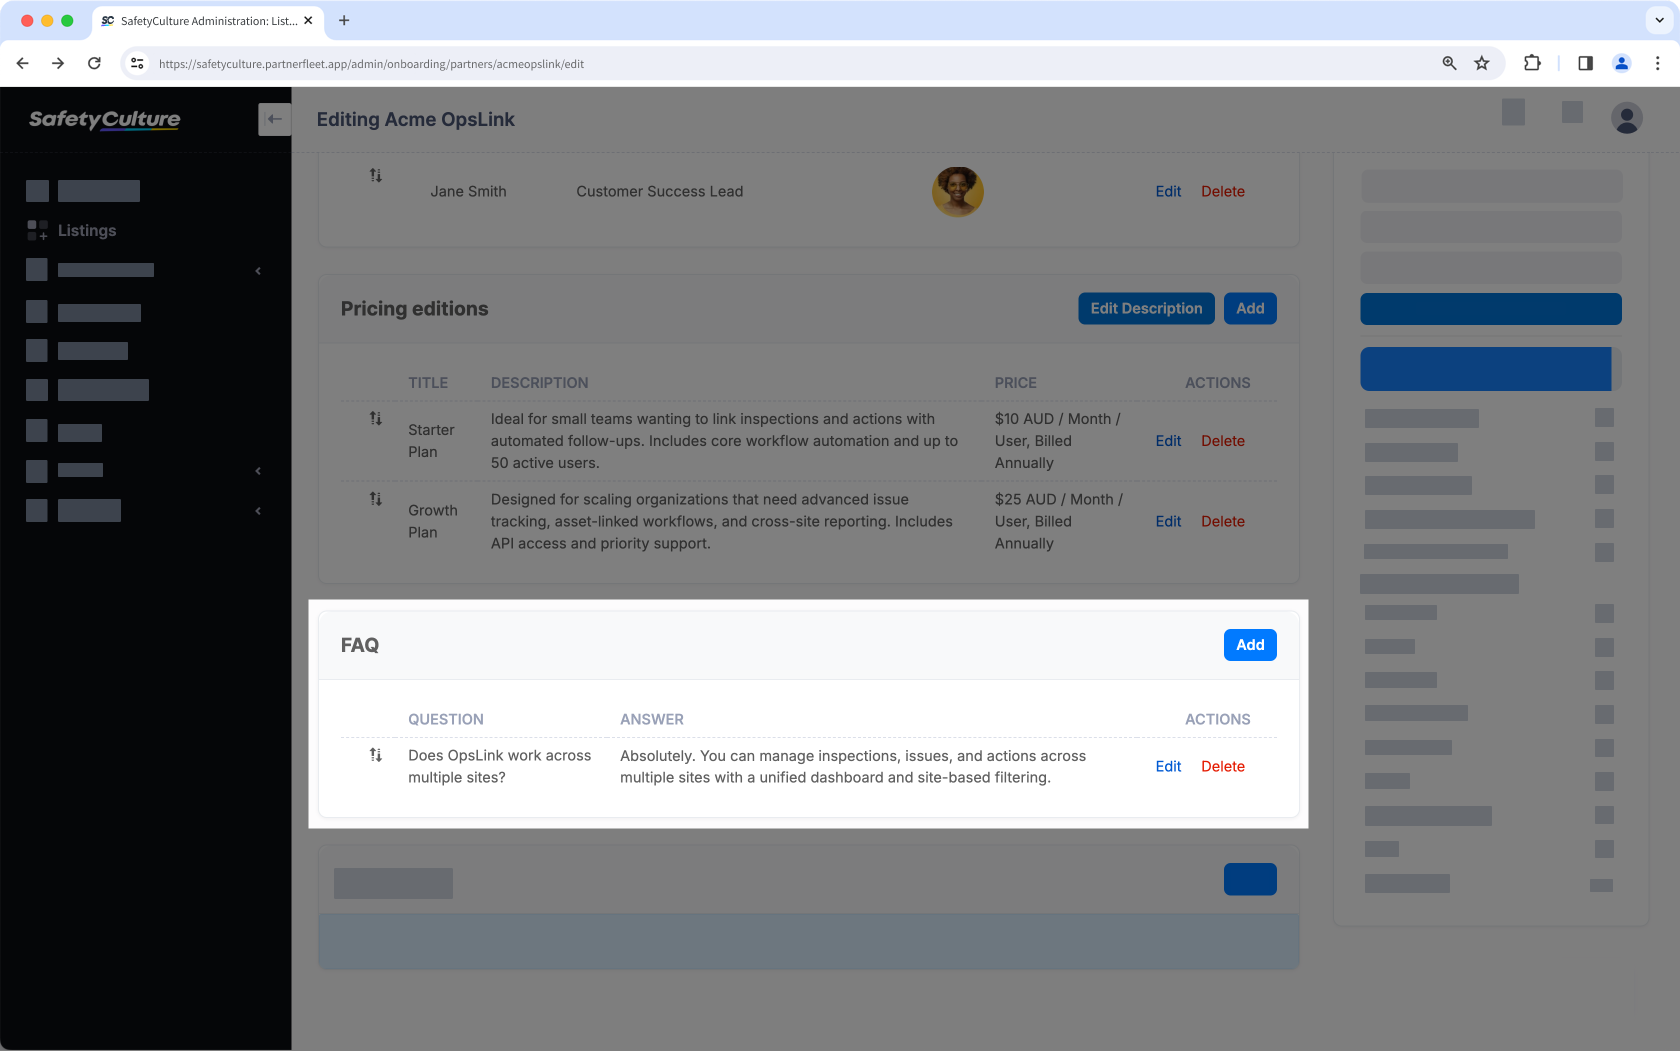 | 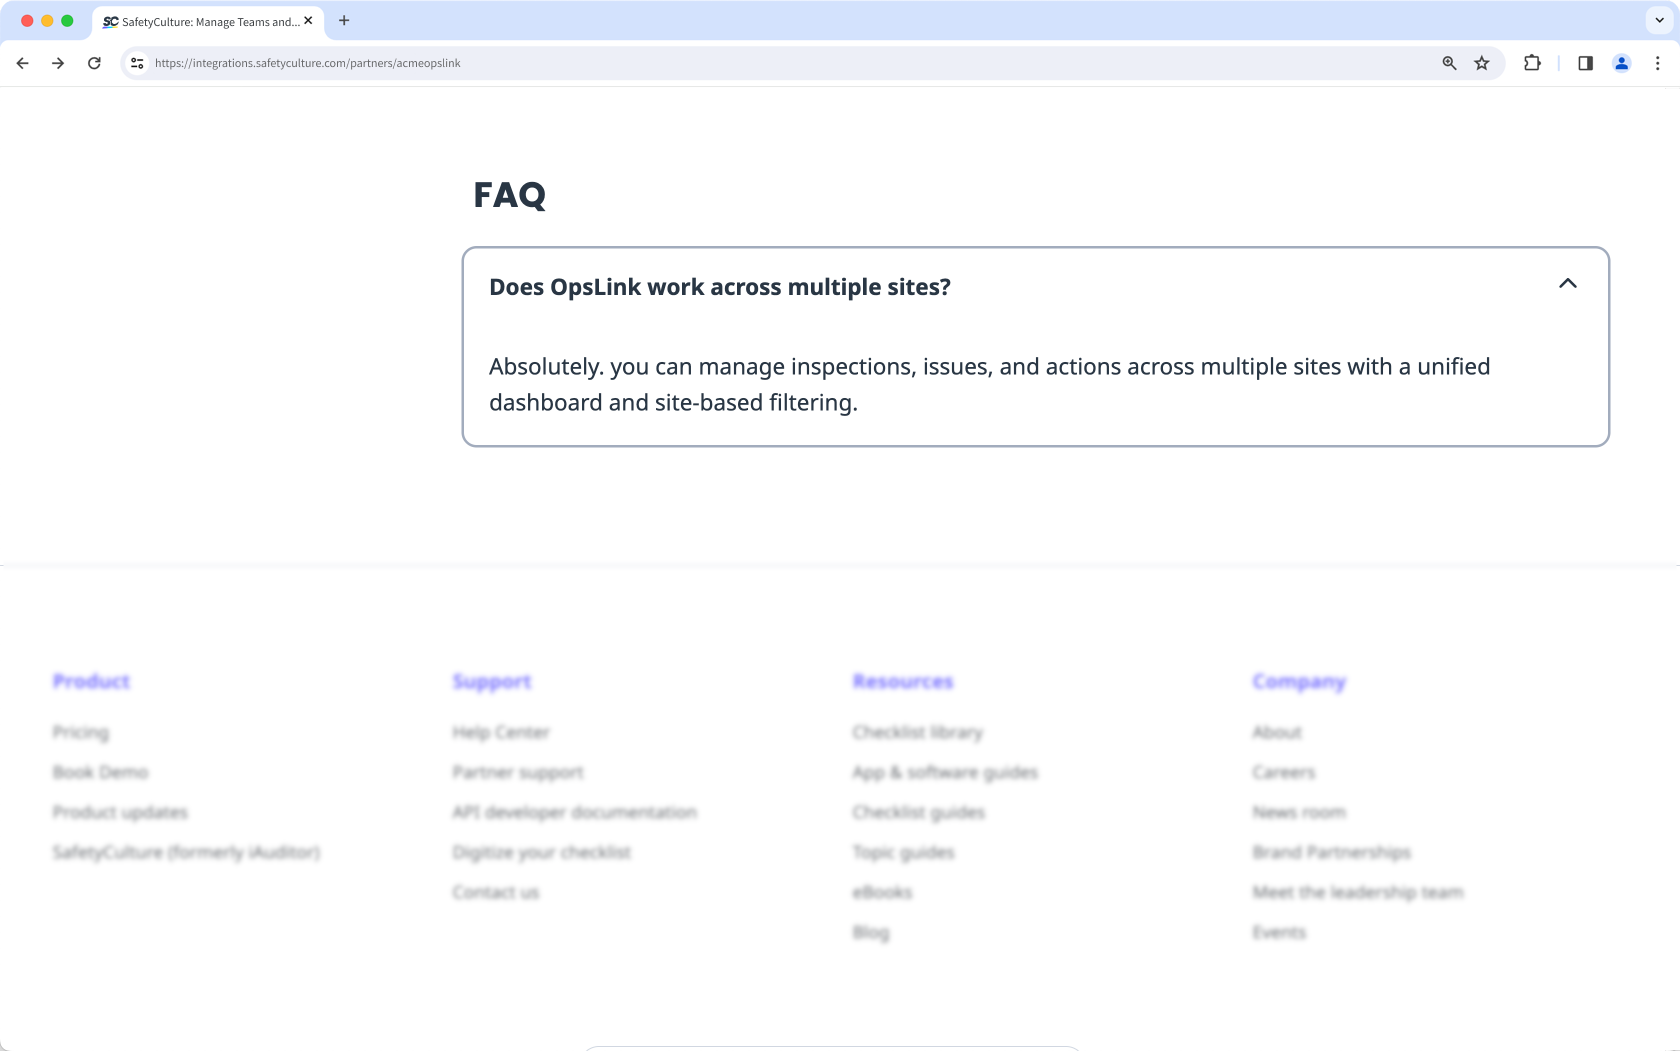 |
- Question
Phrase questions the way customers would naturally ask, and keep answers short, consistent, and easy to scan. - Answer
Provide a concise response that resolves the customer’s question. Aim for 1–3 sentences, using clear, friendly language.
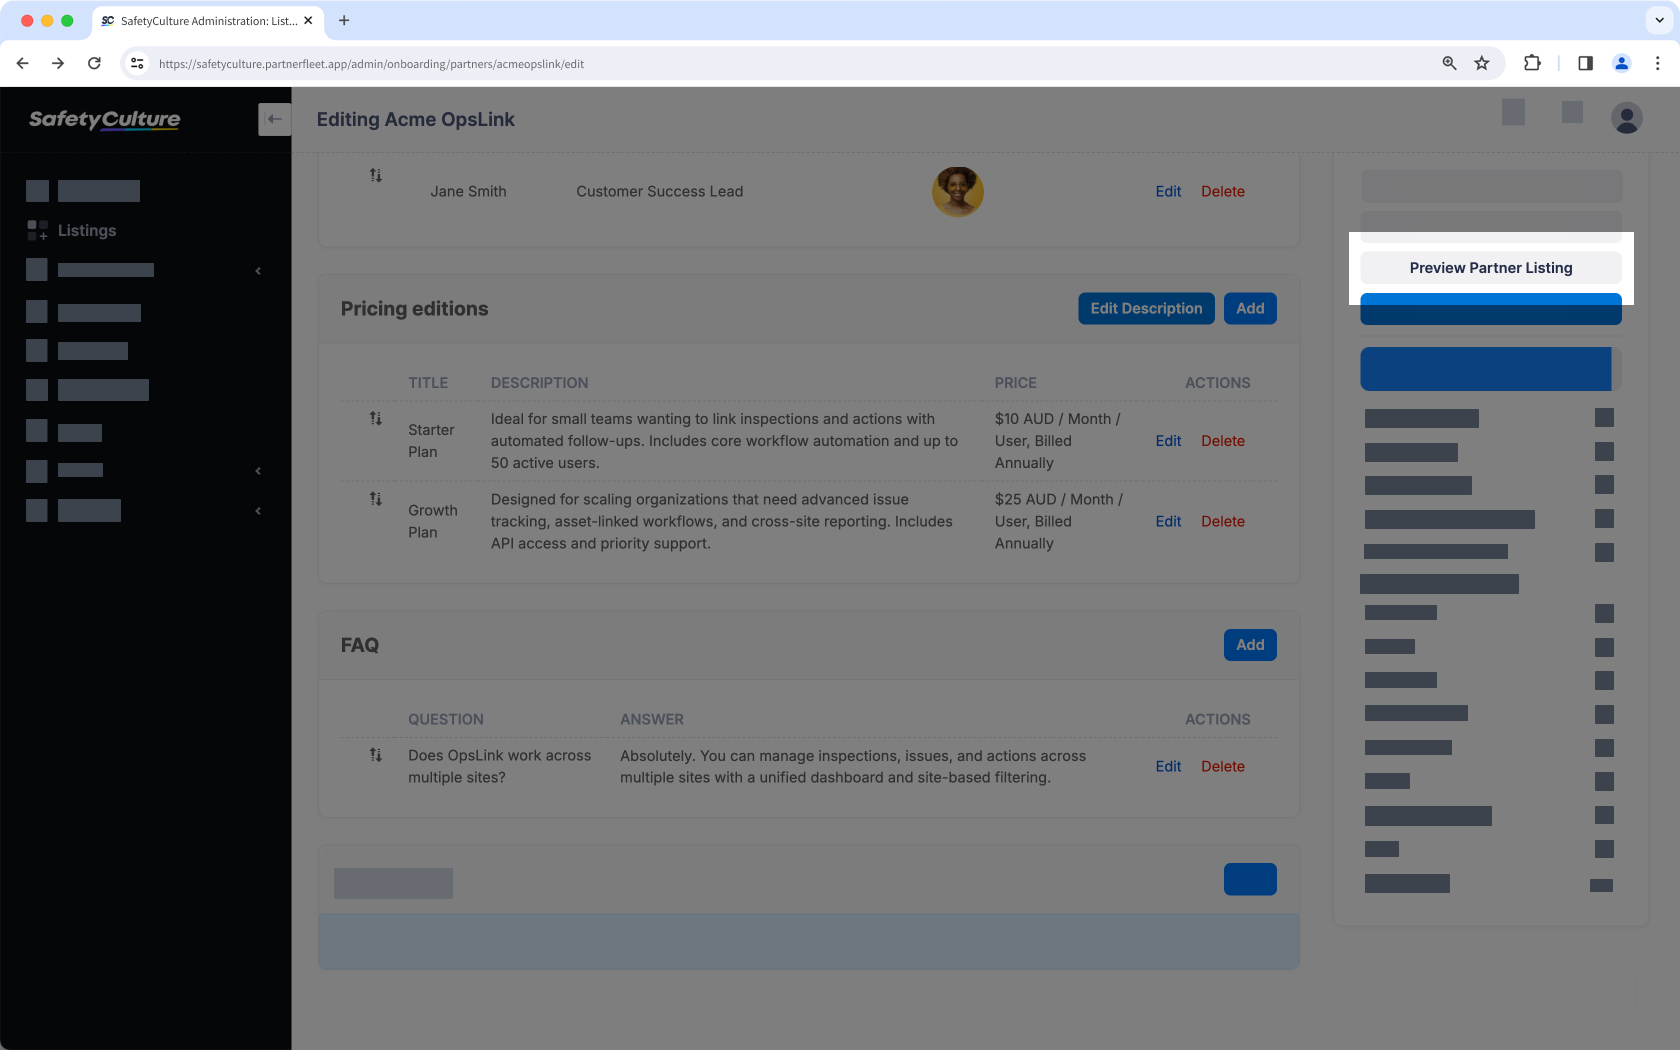
3. Preview your listing
Before you submit, click Preview Partner Listing in the Partner Portal to see how your listing appears in the Integrations Marketplace site and in-product.
Review the following sections:
- Card and header: Names and taglines read cleanly without truncation. Logos look crisp and are sized consistently.
- Copy: Lead with benefits and keep claims factual. Use consistent SafetyCulture terminology and tone of voice where possible.
- Visuals: Images and any video load quickly and feel uniform. Avoid pixelation, stretching, or odd aspect ratios.
- Links and CTAs: Verify that the lead form opens and submits correctly. Secondary CTAs, resources, and the support contact must all be active.
- Details: Permissions, developer name, About Us, and the disclaimer are accurate and present. Remove placeholders or “TBD” text.
Confirm your listing is accurate, consistent, accessible, and conversion-ready so customers can understand the value in seconds, trust what they see, and take the next step (submit a lead or visit your setup link) without friction.
4. Submission process
When your content is ready, submit your listing for review. Make sure the integration is functional in a non-demo environment, the support contact is correct, claims are factual, brand assets meet the guidelines, and any geography or availability notes are included.
Coordinating a launch? Share your target date with us so review and publishing can align.
If you’re coordinating a launch or announcement, share your target date so review and publishing can align. Your Partner Manager will complete the submission and confirm receipt.
5. Review and approval
SafetyCulture reviews each listing for clarity, accuracy, customer readiness, and brand consistency. We may make minor edits or request changes if we spot unverifiable claims, off-brand language, low-quality images, or missing details.
You’ll receive a single set of comments if updates are needed; resubmit once addressed. Approved listings are scheduled for publishing, and timing will be confirmed with you.
6. After your listing goes live
Once live, confirm the card appears in all expected surfaces, the page loads quickly, and CTAs and resource links work. Check that the lead emails reach the right recipients and replies go out promptly. Share the listing on your site and with customer-facing teams, and establish a simple response playbook for inbound leads.
7. Maintain your listing
Treat your listing as a living asset. Keep it accurate, trustworthy, and conversion-ready. Contact your Partner Manager for major updates or lifecycle changes.
- Keep content current: Update screenshots, features, pricing, availability, and resources when your product changes. Refresh testimonials or case studies if they get stale (aim for the last 12–18 months).
- Review on a cadence: Scan for broken links, outdated copy, or mismatched image sizes. We also recomend you revisit messaging, swap low-engagement images, and refine taglines bi-annually.
- Manage structural changes and plan for exceptions: Submit routine edits to your Partner Manager. If you pause or deprecate the integration, notify your Partner Manager so we can update or remove the page and guide existing customers.
Updated 9 months ago